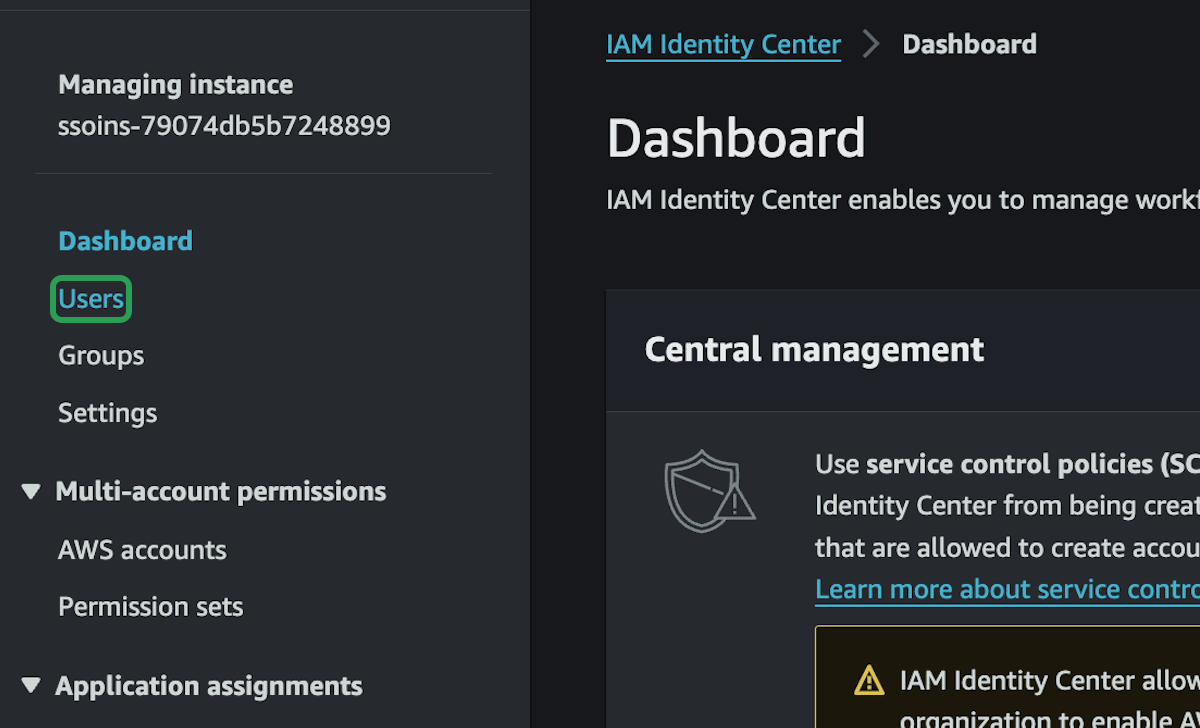
Add Admin User

We are currently logged into AWS with the root account which has unrestricted access to everything. If your login details were compromised, you would basically be SOL. So it's better to setup a different user with admin access that has a few more restrictions, has to re-authenticate more frequently, and can have it's access revoked if you suspect the details are ever compromised.

step 1:

Search for and select IAM Identity Center

Search for and select **IAM Identity Center**
step 2:

Enable IAM Identity Center

Enable IAM Identity Center
step 3:

Click on Users, then Add user

Click on **Users**, then **Add user**
step 4:

Enter all of your details, this is your personal account

Enter all of your details, this is your personal account
step 5:

Leave everything else alone and click *Next

Leave everything else alone and click **Next*
step 6:

Don't create an groups, just click Next

Don't create an groups, just click **Next**

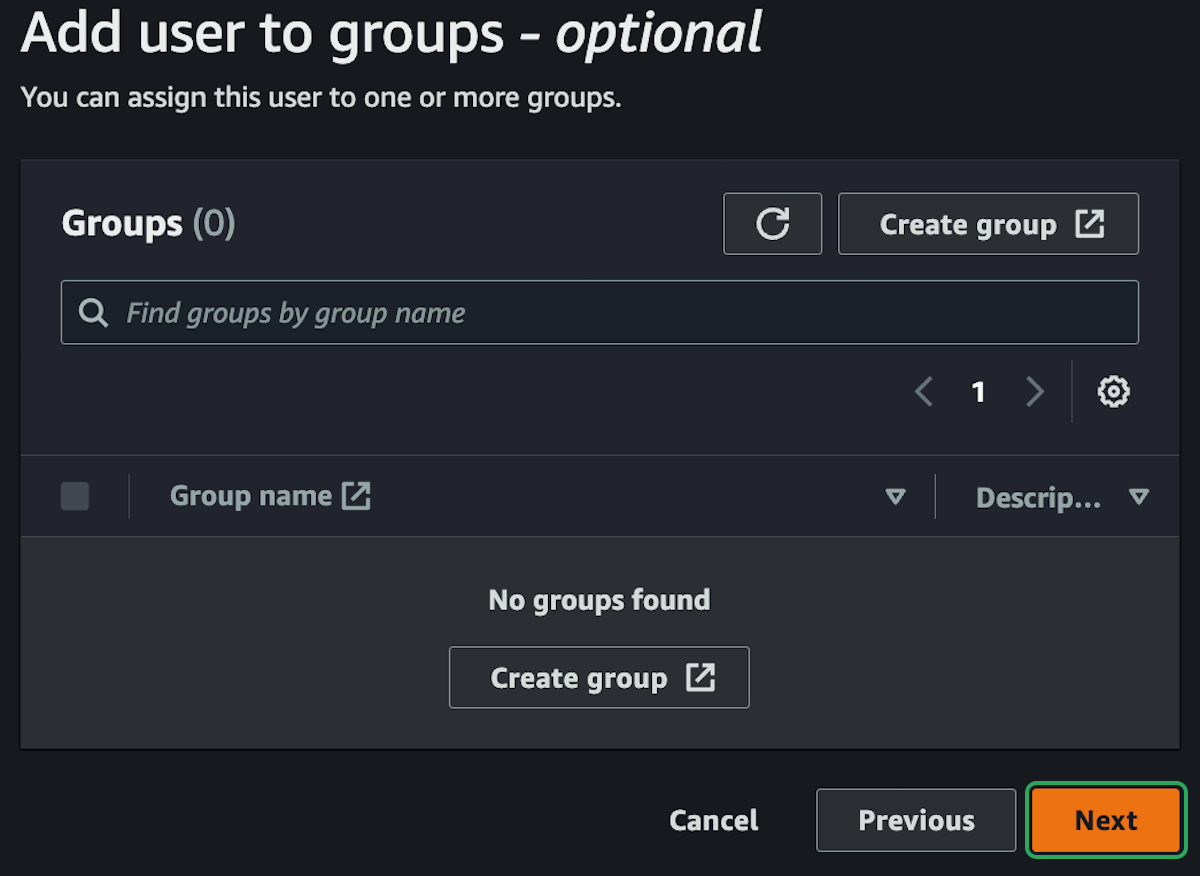
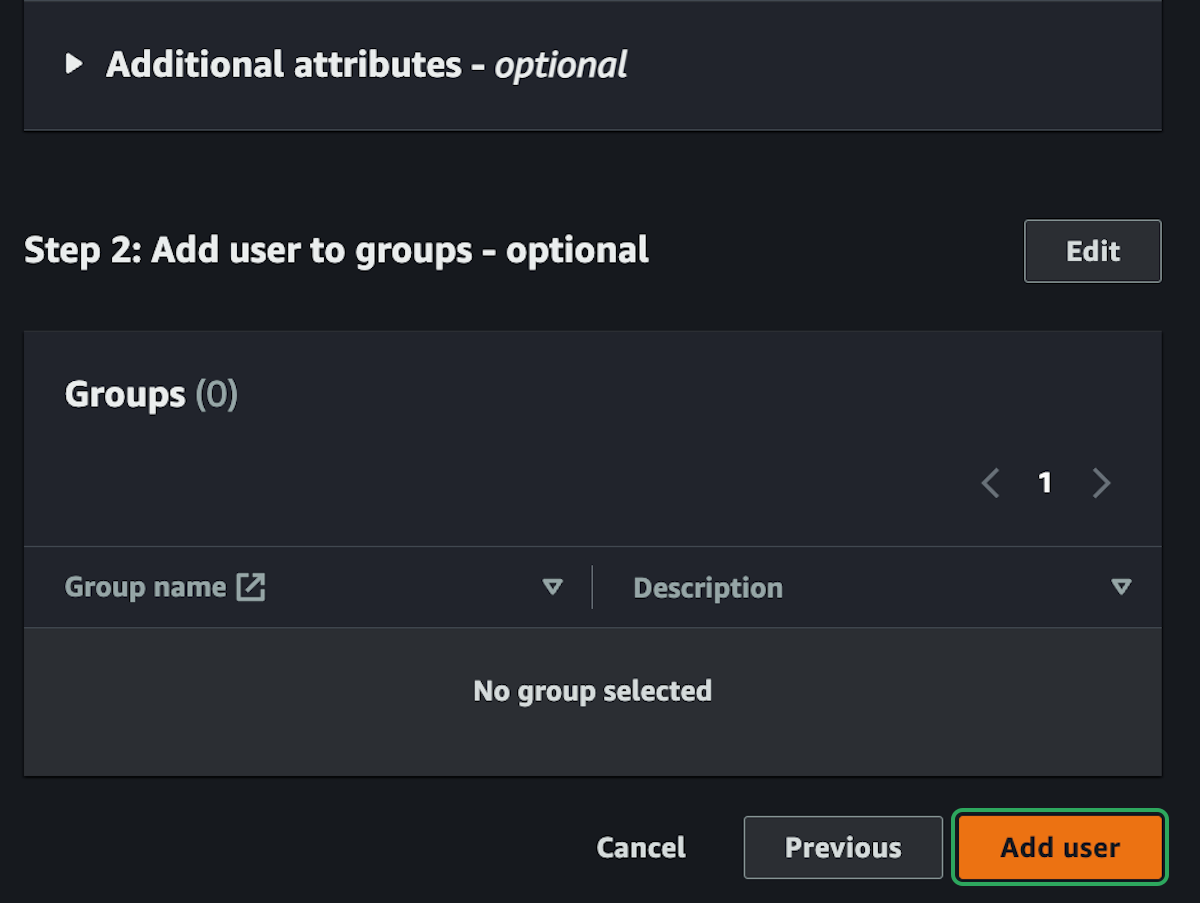
Groups are a great way of organizing users when you have a larger organization on AWS, but just for personal use, we don't need any groups.

step 7:

Verify the details and click on Add user

Verify the details and click on **Add user**

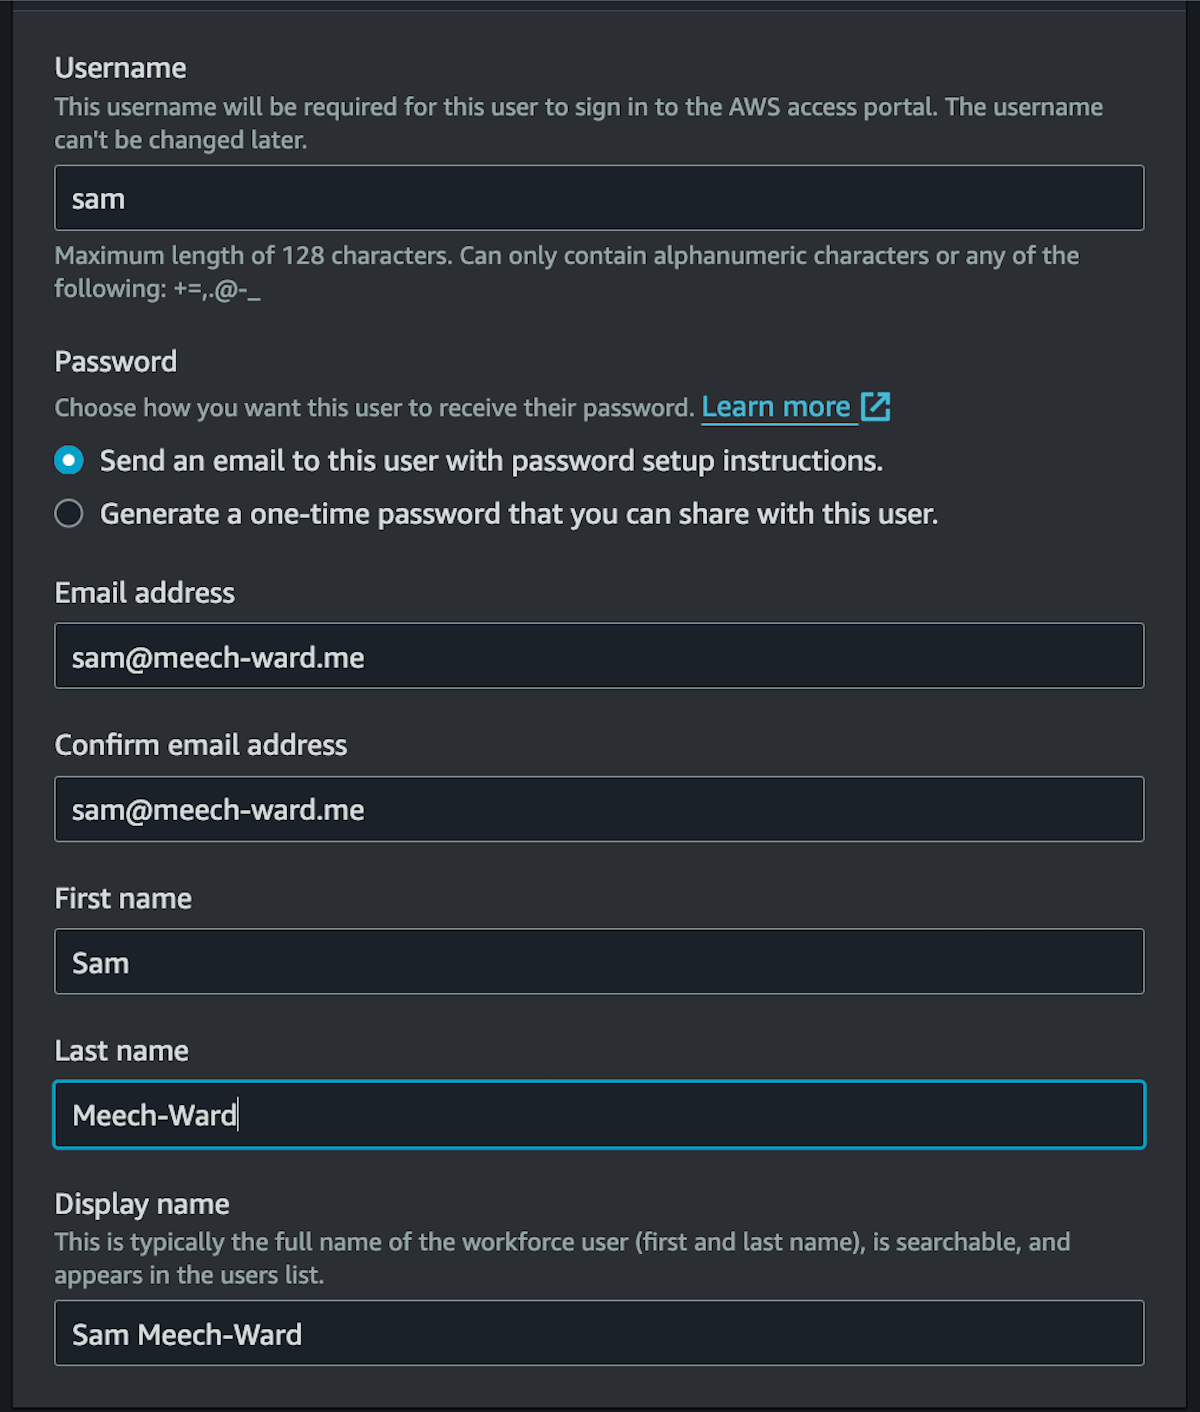
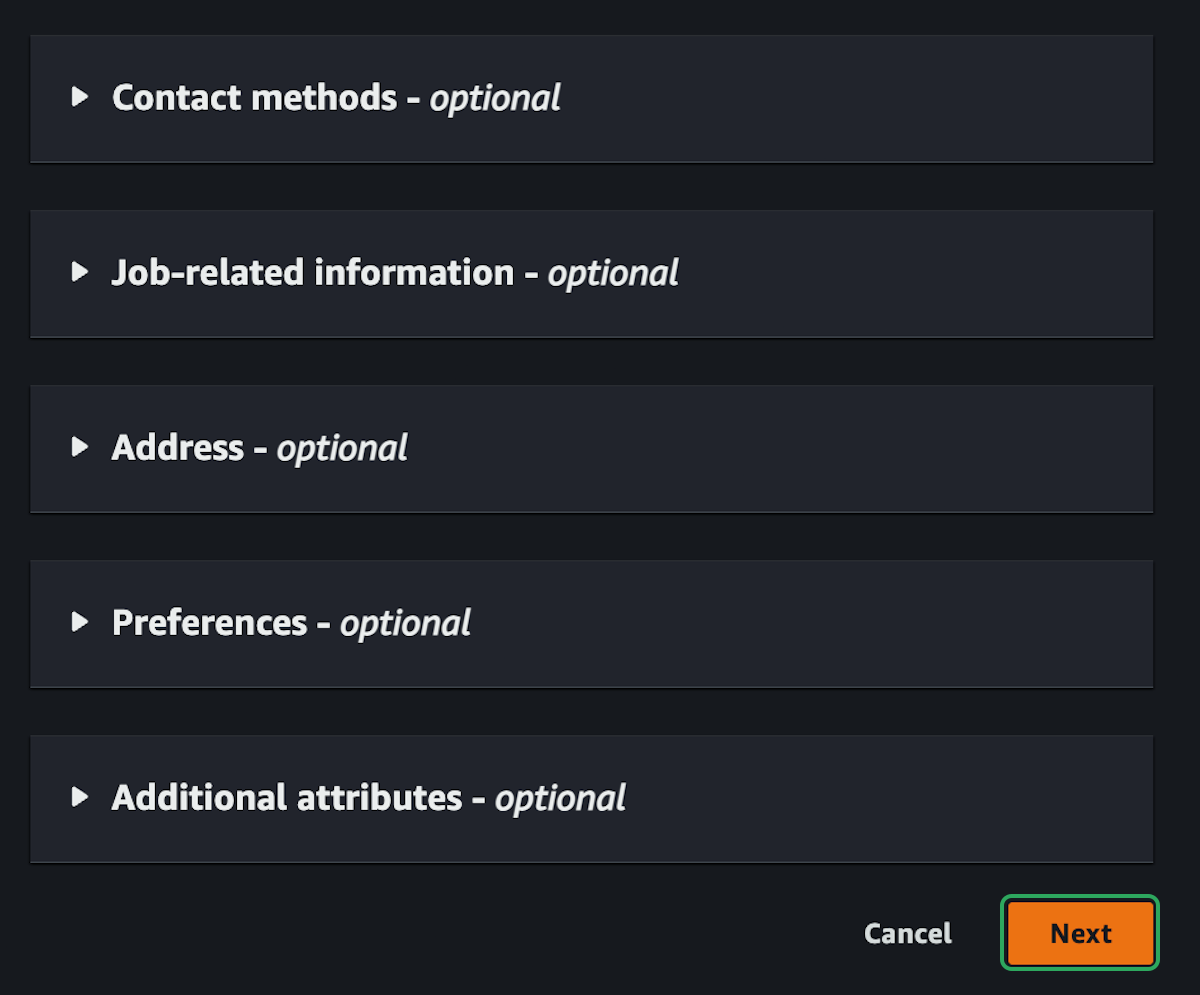
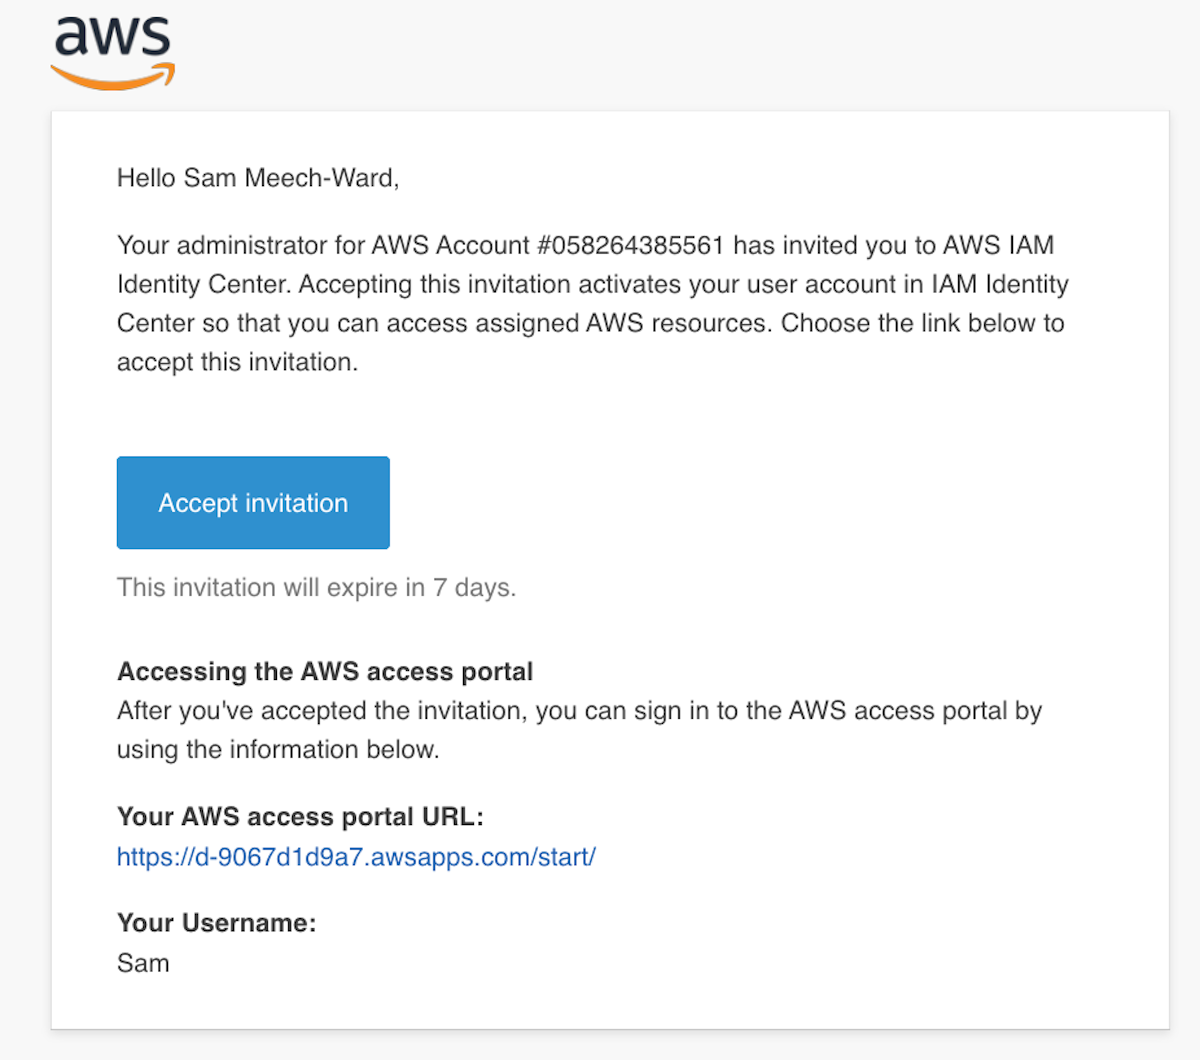
This will create the new user and send them an email to verify their account and setup their password. This new user account will be how you access everything in AWS.

Permissions

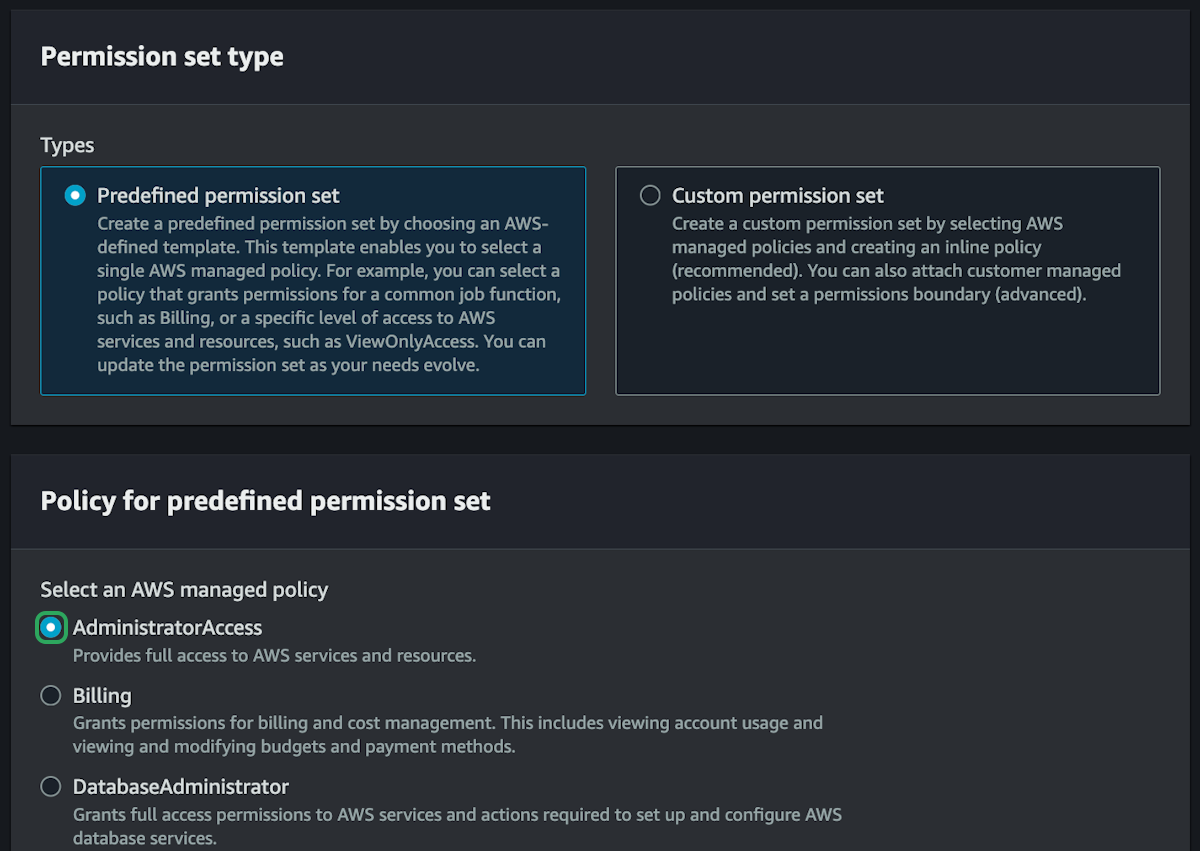
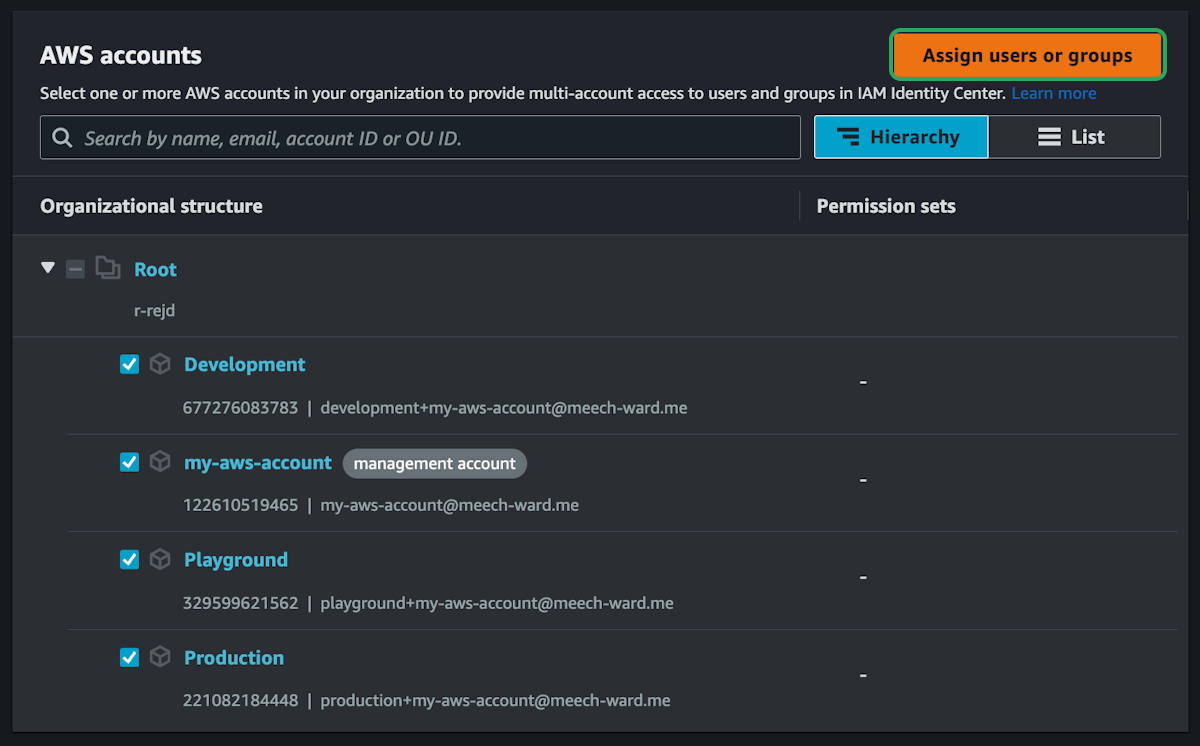
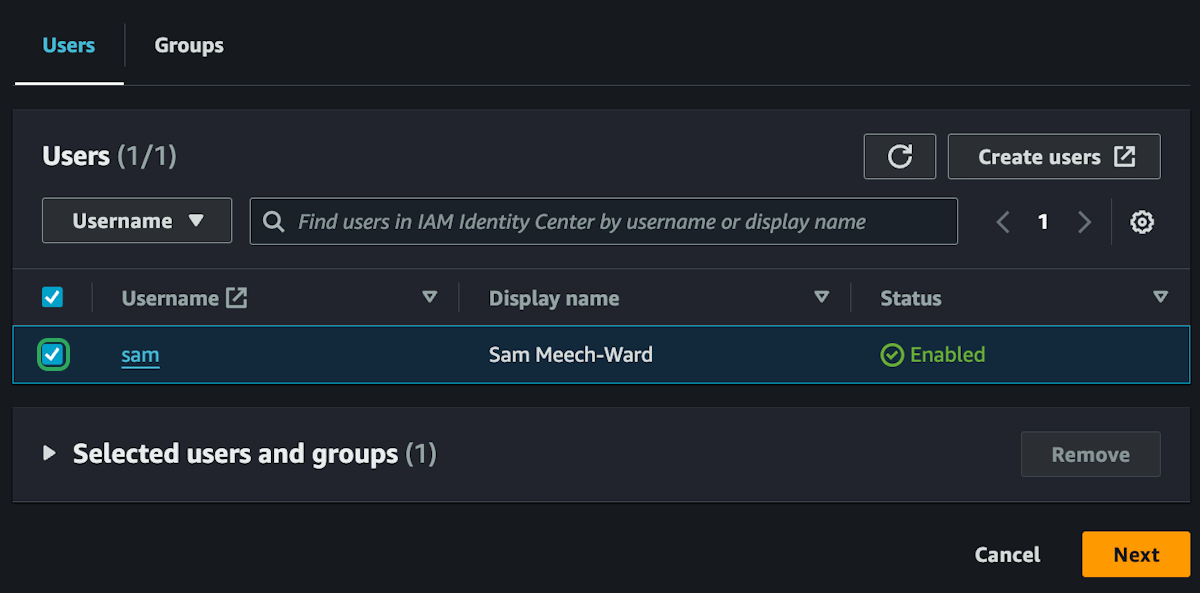
We have the user setup, but that user can't access anything. By default, everything in AWS is locked down and you need to be granted permission to do anything. So we now need to give the new user permission to do things in the accounts we created.

step 8:

In IAM Identity Center, click on Permission sets then Create permission set

In IAM Identity Center, click on **Permission sets** then **Create permission set**

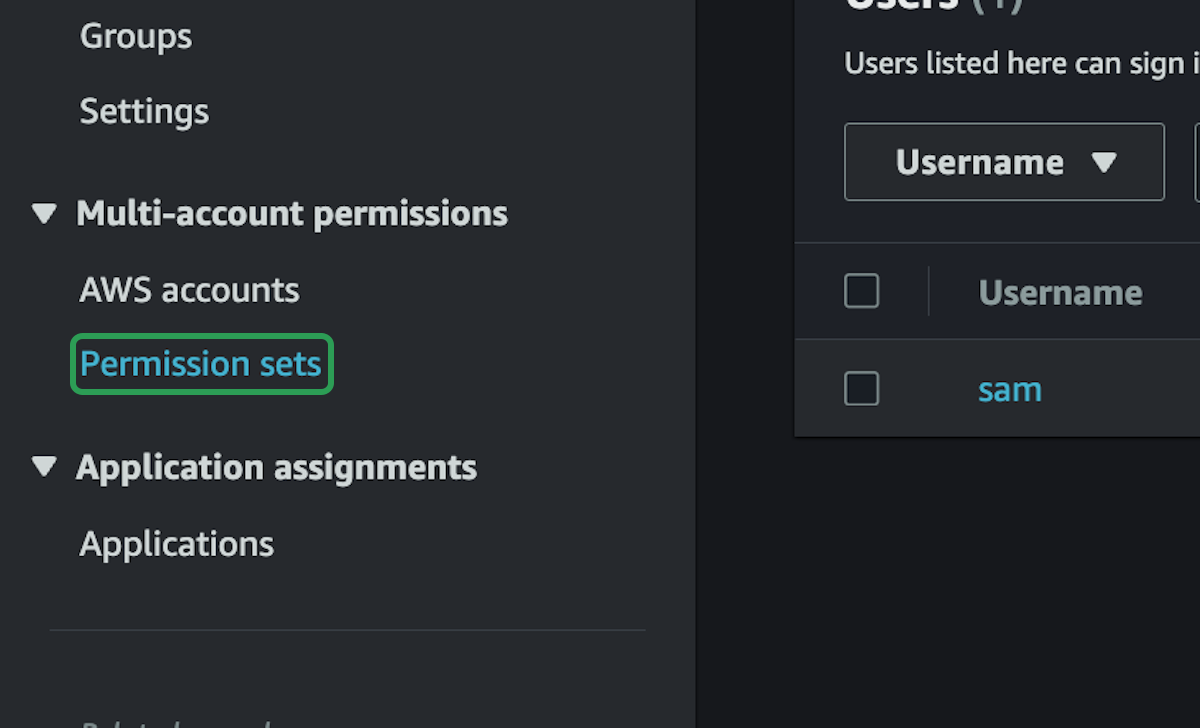
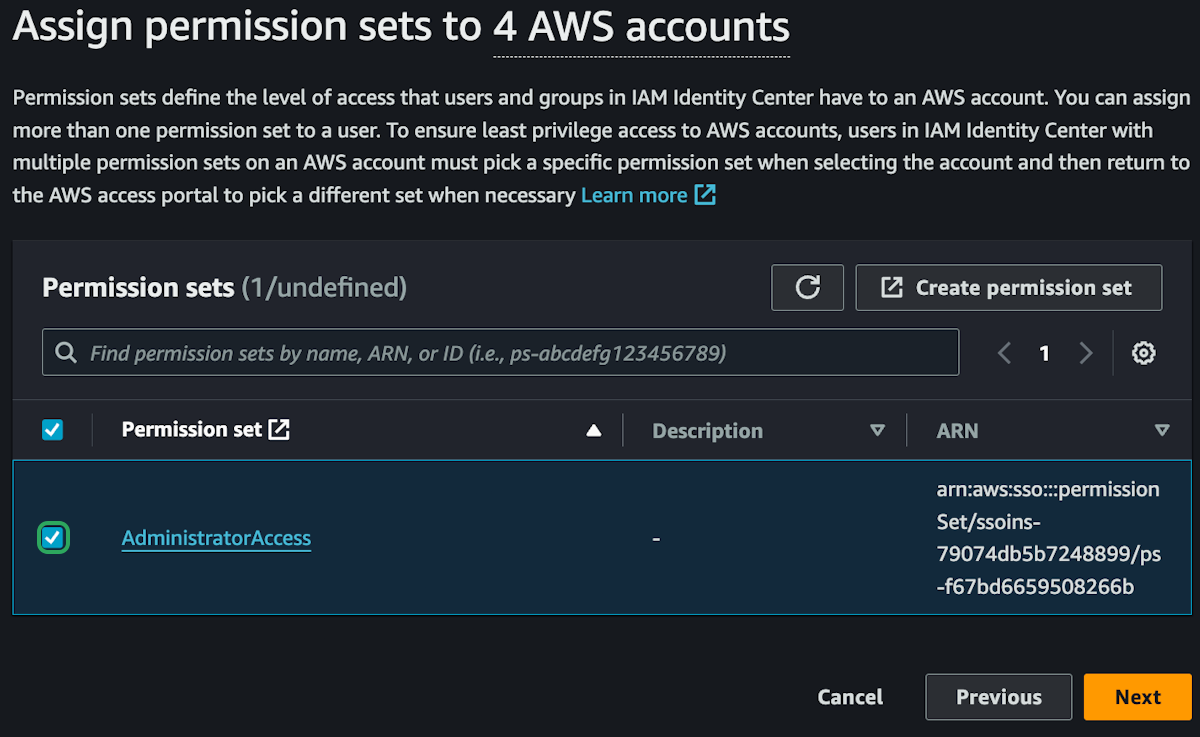
We can create custom permissions for users or use some predefined rules created by AWS. We are currently setting up the permissions for your own personal account, and you need AdministratorAccess so that you can do anything in your own AWS account. However, if you were creating users for other people like developers or business owners or DBAs, you would want to limit their access more.

step 9:

Select AdministratorAccess and click Next

Select **AdministratorAccess** and click **Next**
step 10:

Select 12 hours for the Session duration, and click Next

Select 12 hours for the Session duration, and click **Next**

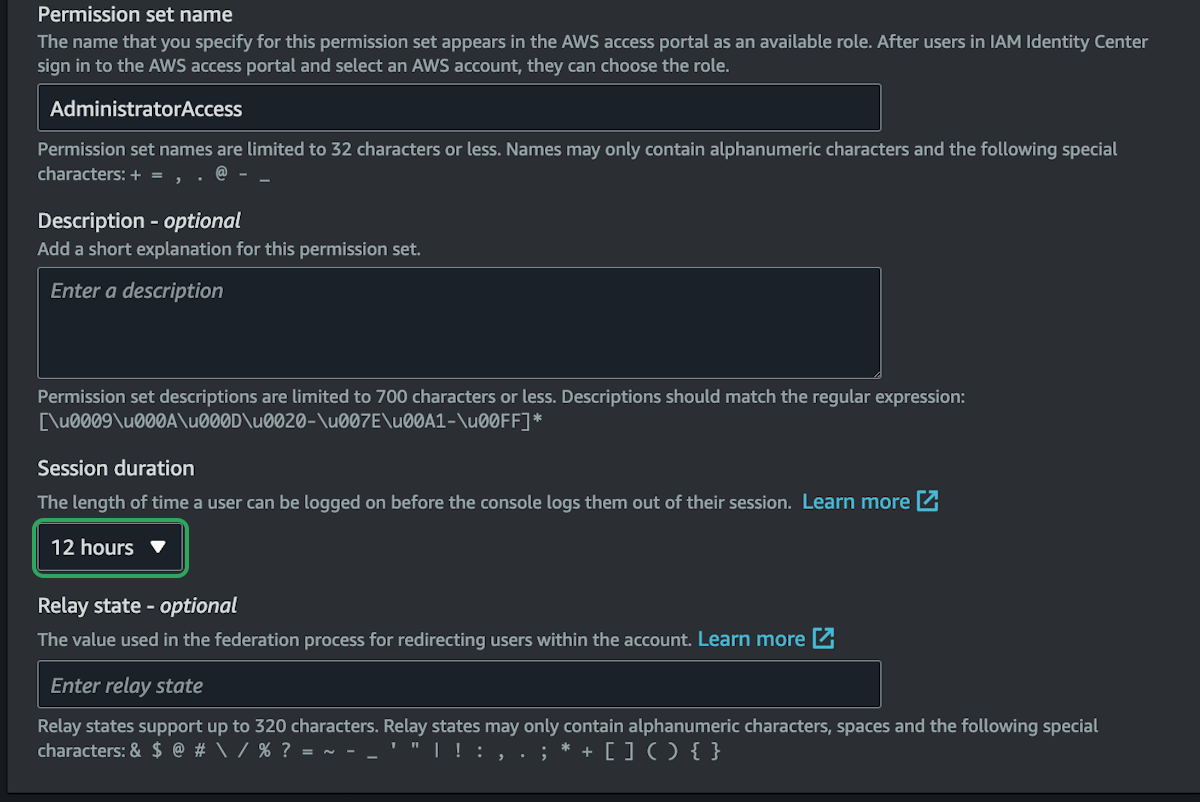
The session duration is how often you will need to re-login to your account. 12 hours is the current maximum amount of time. This is important to remember when using the CLI since you'll need to re-authenticate from the command line every 12 hours.

step 11:

Click on Create

We have four accounts setup, one user, and one permission set. But they are not yet connected. We now need to tell AWS that the new user has the admin permissions on those four accounts.

Click on Create ## Link User to Accounts We have four accounts setup, one user, and one permissio...
step 12:

In IAM Identity Center, click on AWS accounts

In IAM Identity Center, click on **AWS accounts**
step 13:

Select all four accounts then click on Assign users or groups

Select all four accounts then click on **Assign users or groups**
step 14:

Click on Users, select your user, then click on Next

Click on **Users**, select your user, then click on **Next**
step 15:

Check Administrator Access, then click Next

Check **Administrator Access**, then click **Next**
step 16:

Check everything is correct and click Submit

Check everything is correct and click **Submit**

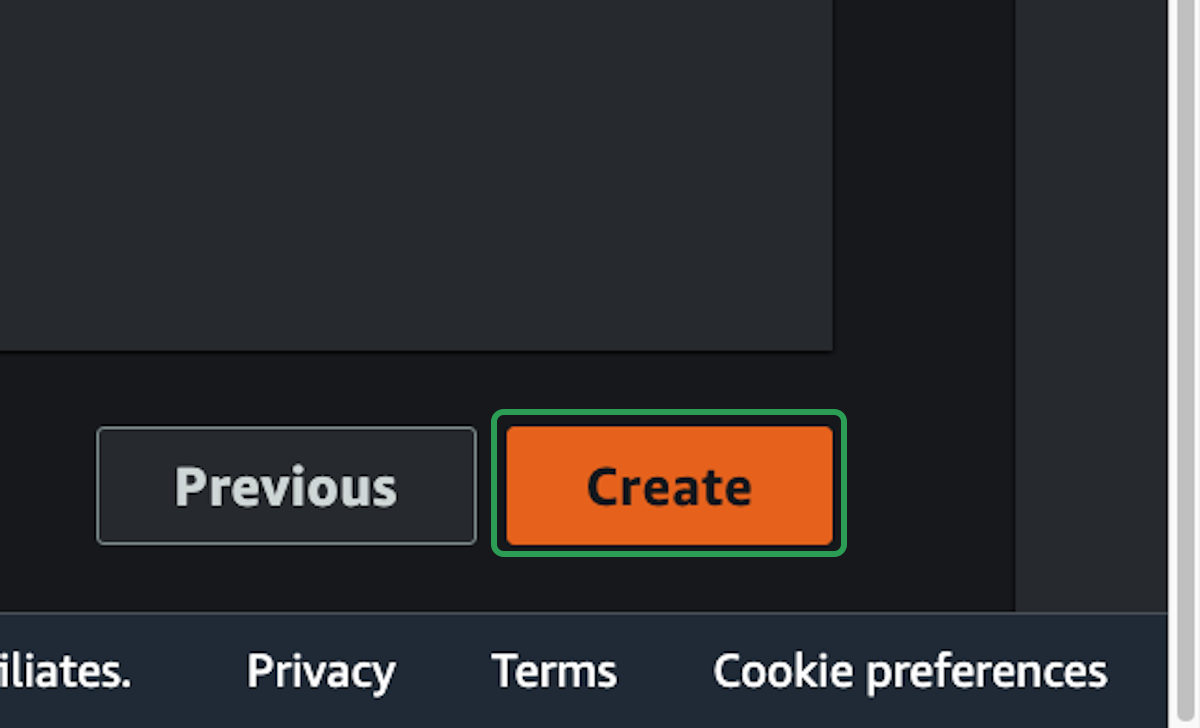
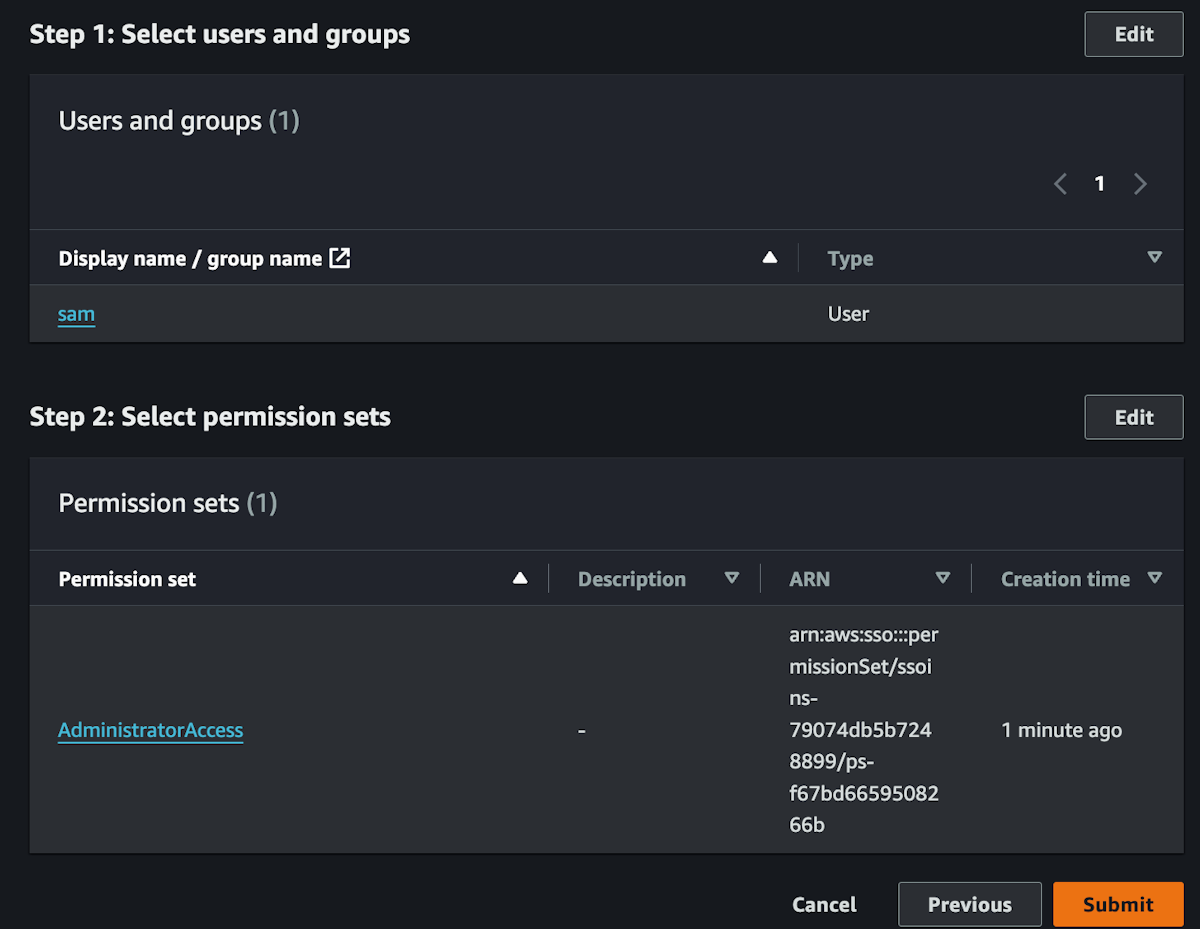
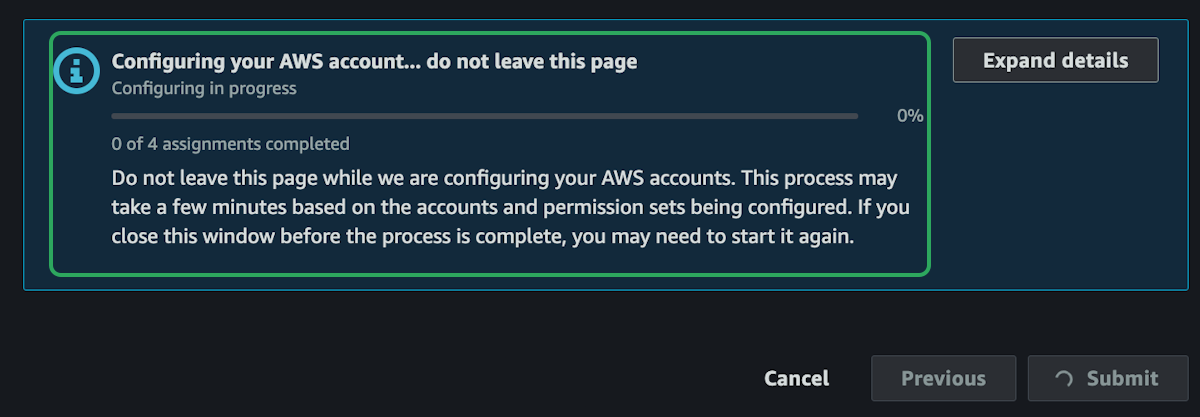
This will process giving the user admin permissions. Do not leave this page until it's complete.
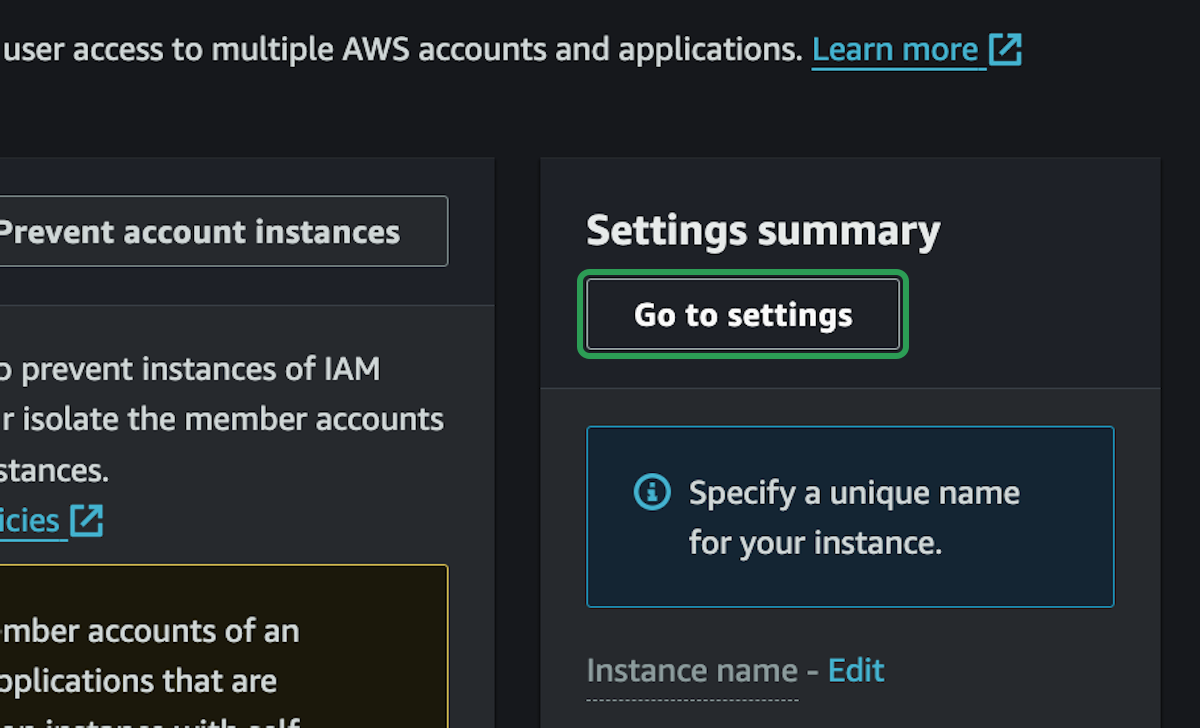
Custom URL

We're almost done, there's just one more thing that's nice to setup with our new accounts. A custom URL.

step 17:

In IAM Identity Center, click on Dashboard

In IAM Identity Center, click on **Dashboard**
step 18:

Click on Go to settings

Click on Go to settings
step 19:

From the Actions dropdown, click on Customize AWS access portal URL

From the **Actions** dropdown, click on **Customize AWS access portal URL**
step 20:

Enter a unique name for your accounts, something you can easily remember, and click Save

Enter a unique name for your accounts, something you can easily remember, and click **Save**

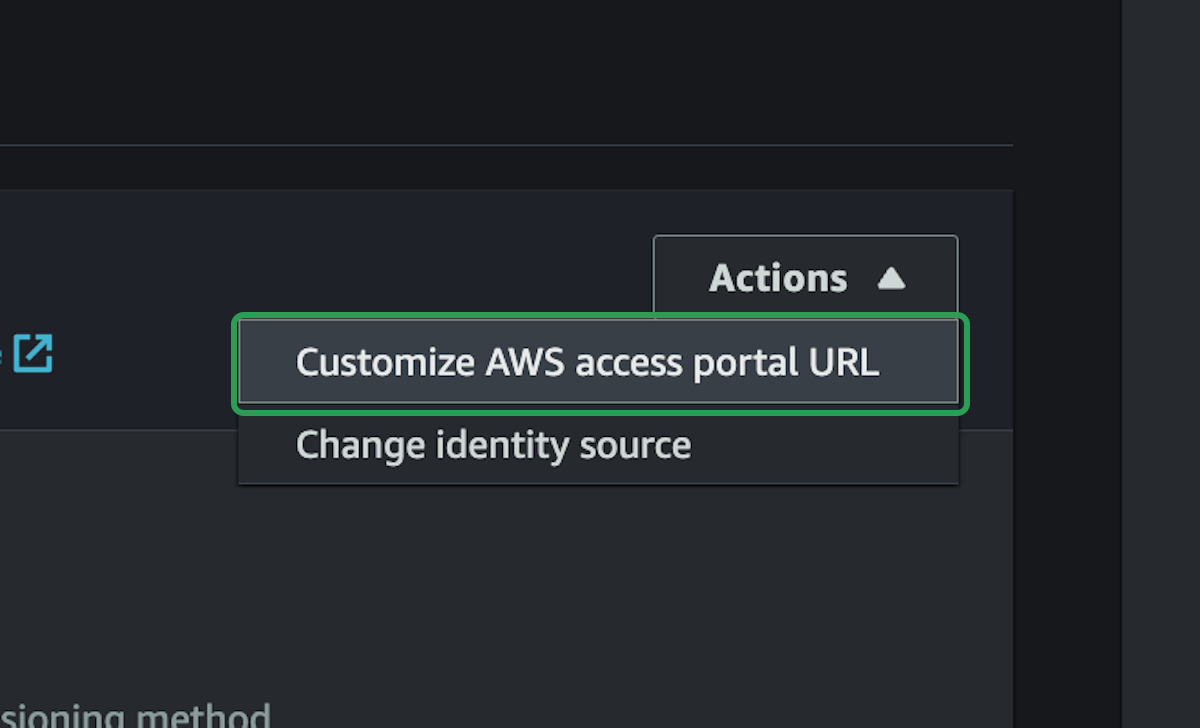
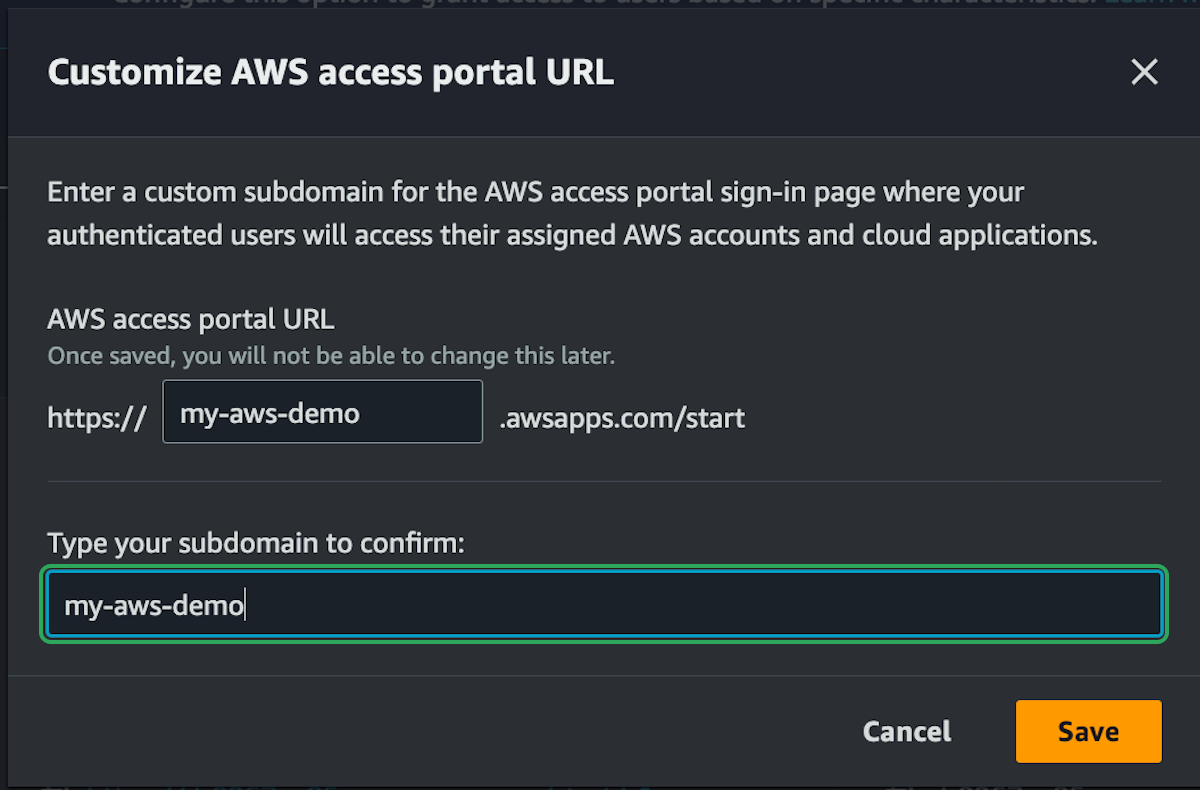
You will now be able to access you accounts with that custom URL.

IAM User

At this point, we're done using the root user account. If you need to delete your account in the future or create more users, you can login with this account. But for day-to-day use, we won't use the root account.

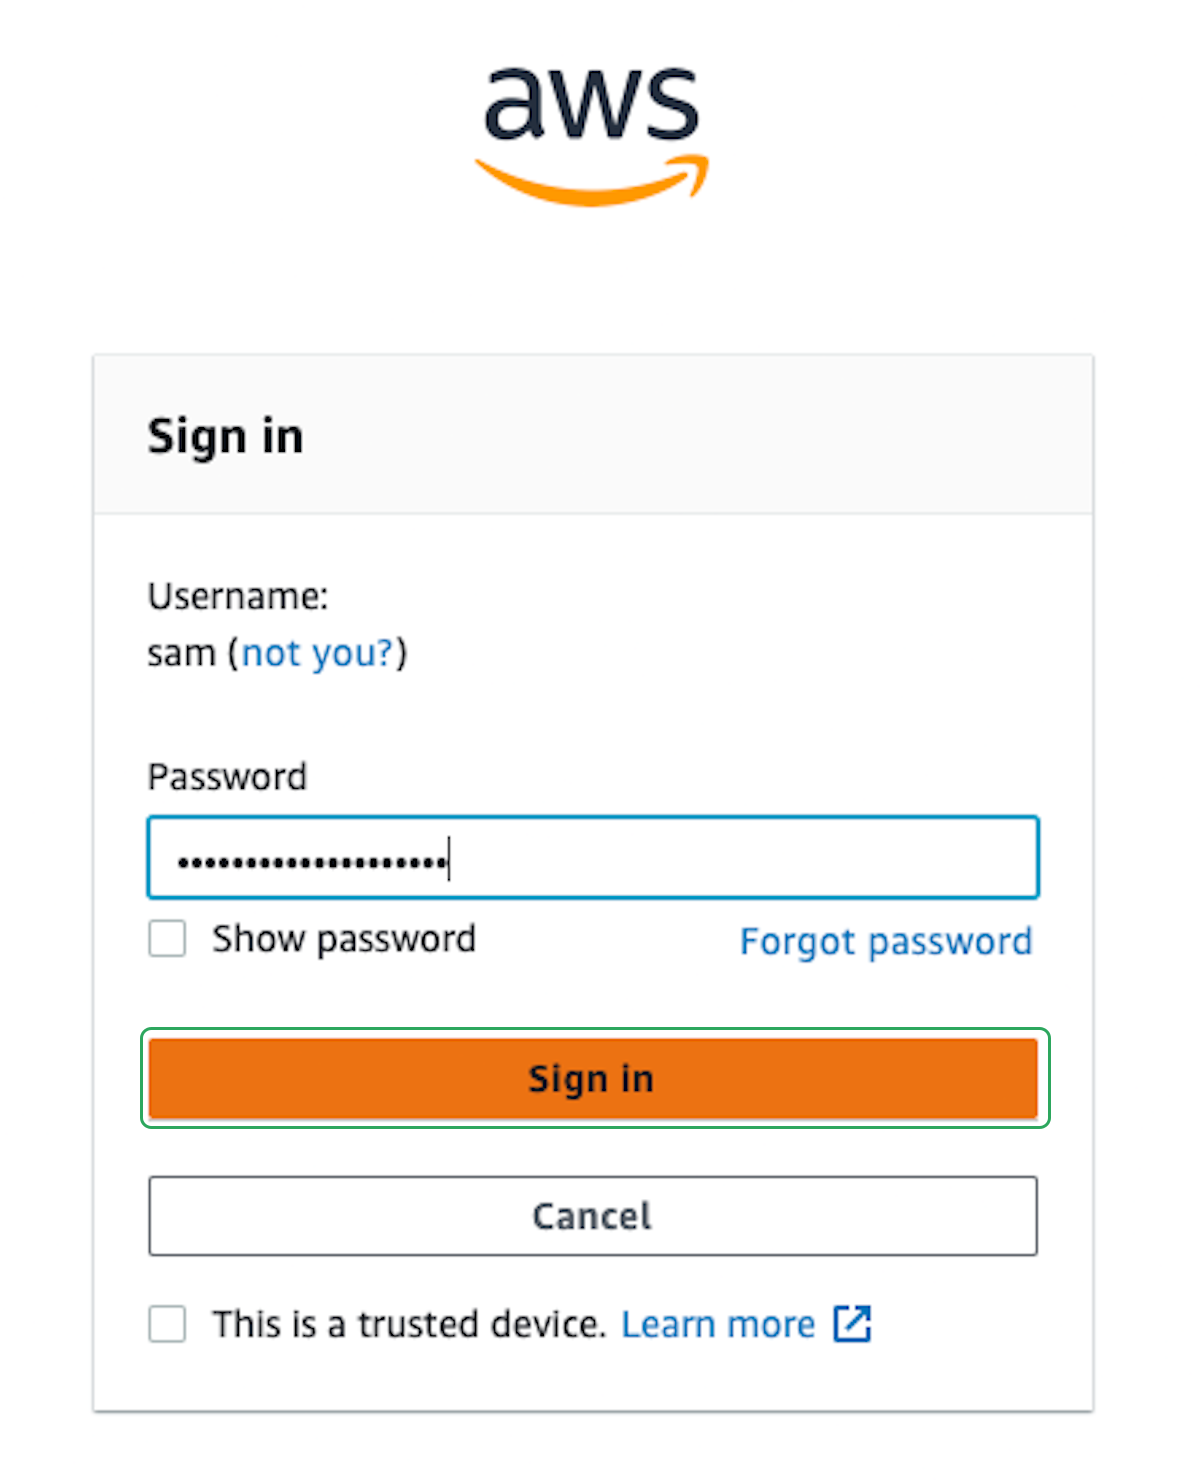
For the rest of this course, we will only be using the new user we just setup in IAM Identity Center.

step 21:

You should have received an email that looks like this. Click Accept invitation

You should have received an email that looks like this. Click **Accept invitation**
step 22:

Create a new password and click Set new password

Create a new password and click **Set new password**
step 23:

Sign in as your new user

Sign in as your new user
step 24:

Setup multi factor auth

Setup multi factor auth

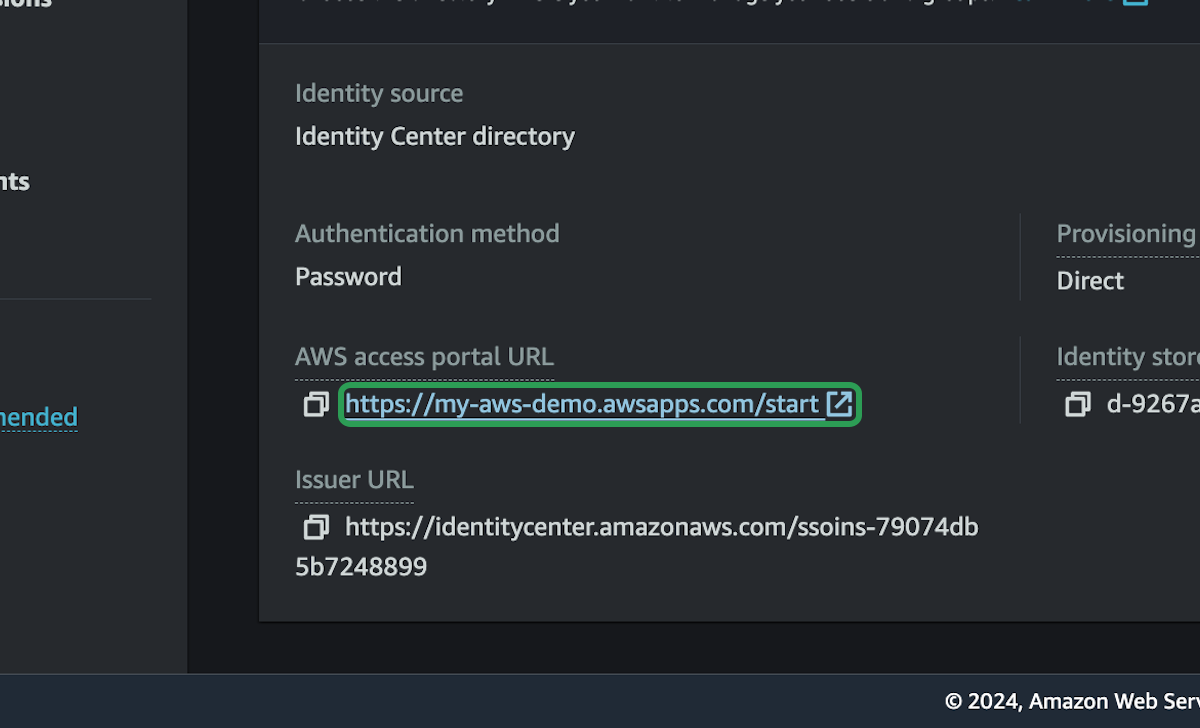
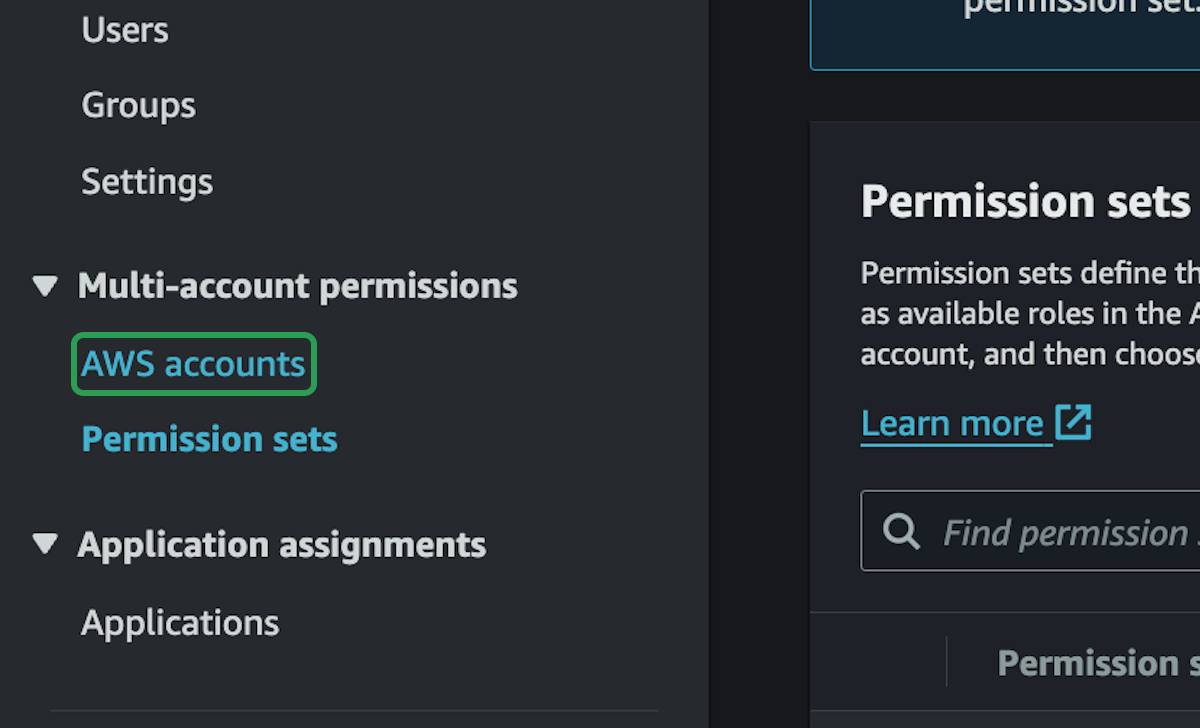
You should now be able to visit your custom AWS URL and see all the accounts you setup. This user can access any of those accounts with AdministratorAccess. If you click on AdministratorAccess under and account, you will be taken to that account. Feel free to go to Playground and take a look around.

Show timestamps
00:00
I keep saying that we're logged in as the root user and we really don't wanna be logged in as
00:04
the root user It has absolute admin privileges over everything.
00:07
So instead what we're gonna do is create a new user for ourselves and we're gonna give ourself
00:12
admin privileges within each account it's gonna be slightly less elevated privileges than the
00:17
root account So we won't be able to shut down the entire organization or shut down these
00:20
accounts from this separate admin account Then we can also create other users if we wanted to
00:25
allow other people other people that we work with or friends or whatever To be able to access
00:29
certain infrastructure within our AWS account But right now we're just gonna go up to the top
00:33
and we're gonna go to IIM identity center and we're just gonna set up the user that we will use
00:38
personally to log in to our AWS account So first we have to enable I am identity center and is
00:45
this the right region So really you can use any region you want here This is just uh from a drop
00:49
down menu at the top These are just different places in the world We'll get to that in a little
00:53
bit But uh it's saying that you might wanna choose a region
00:56
that's closer to where you're gonna be accessing AWS from.
00:59
So if I'm in Vancouver Canada I might wanna use US West two because that's a little bit closer
01:04
to me But it really doesn't matter You could choose the US East one region That would be
01:08
absolutely fine but I am gonna go with Oregon here and I'm gonna enable I am IDense center So
01:13
I've successfully created the organization instance and I can see I set that up in US West two
01:17
Just make sure you remember which region you selected And now we're gonna go set up the user for
01:22
ourselves So if we go into the user section here can see there's currently no users We haven't set up any users for this organization.
01:28
So we're gonna add a user and I am just going to give myself my own username and I will send an
01:34
email to myself with password setup instructions And this I'm just gonna use my email address So
01:40
sam at cloud course dot dev I don't need a separate email address here This is just for my
01:45
personal I am user and I'll just enter my details Then we can just skip over all of this and
01:50
click next And we can organize users into groups if we want to and this is really handy when you
01:55
have a larger organization You want to separate the developers from the finance people from the
02:01
IT people but we don't need this right now just for our own personal setups I'm gonna click next
02:05
And then all of that looks good So we can scroll to the bottom click add user And I now have
02:11
this user setup user Sam and I'm gonna use this user to log in to all of those accounts So we
02:15
need to actually hook this user up to the accounts give it permission to access the other
02:20
accounts that we can log in and start using AWS through this I'm user So for that we're gonna go
02:24
down to permission sets right here under multi account permissions And we don't have a
02:29
permission set yet so we're gonna create a permission set And here you can define exactly what
02:33
permissions a user has So you could say that a user can log in to the AWS account and it can
02:38
view all the infrastructure, but they can't create anything or they can only create e c two
02:42
instances but nothing else This can be really handy if you need fine grain control But right now
02:46
we are gonna use a predefined permissions that we're gonna use the administrator access because
02:49
this is for us And we trust ourselves to be able to do whatever we want in our own AWS account
02:54
So we'll have administrator access And if we scroll down we'll go next This is all good The
03:00
session duration So when we log in with SSO this is when we log in to the web browser to access
03:05
AWS but also when we log in through the AWS CLI in our terminal, this is how long our session
03:10
will last for So the maximum we can select is twelve hours meaning we'll have to re log in to
03:16
our account every twelve hours which is kind of a short time frame It can get a little bit
03:20
annoying but this is the longest can choose So if you wanted a shorter duration you could but I
03:24
recommend going twelve hours because it's kind of annoying to always be having to log back into
03:28
AWS account to get permission It is pretty secure but uh let's go with twelve hours and click
03:32
next And then we can just scroll down and click create So right now we have…accounts our
03:38
organization we have the user that we've created for ourselves and we have this permission set
03:43
but they are all separate from each other They don't know about each other So now we have to
03:46
link them all together so that the Sam user can log in to all of those different accounts using
03:52
the administrator access permission set So we'll click on AWS accounts here and it should show
03:57
us There we go There's all the accounts in the organization and I am gonna select all of these
04:01
accounts because I wanna be able to log in to all four of them And I'm gonna assign users or
04:05
groups So this is what we're gonna connect the user right here the Sam user gonna connect that
04:10
user to those accounts So this user will now have access to those accounts.
04:14
And then on the next page we'll say that that user can access those accounts as an administrator.
04:19
This is how we connect them all together And then I'll click next And we can just scroll to the
04:23
bottom click submit And now this will configure for a little while but once this is done that
04:28
Sam user will now have access to all of those accounts So now we really wanna log out of our
04:32
root account and log in as our IAM user which will be a little bit more secure But before we do
04:37
that there's just one more thing I wanna change So we're gonna go over to the dashboard here and
04:42
then we'll scroll down to identity source and there's an actions drop down here We're gonna
04:47
customize the AWS access portal URL This is important because you wanna create a memorable URL
04:52
here that you can type in quickly and we're gonna end up bookmarking it too because this is the
04:56
entry point we're gonna use every single time we wanna log in to AWS.
04:59
So I am gonna enter a sub domain here Let's go cloud course Actually I wonder if that's taken
05:06
Let's try cloud course Okay So I'm gonna click save Cloud course Gotta enter it twice Okay Sick
05:12
Yeah Alright I've got cloud course dot a o u s apps dot com slash dot perfect Okay So this is an
05:18
important URL Copy it bookmark it This is gonna be the easiest way that you can log in to AWS
05:23
account from now on So make sure you have this handy every single time you need to log in And
05:27
when we set up that user earlier for ourselves the IAM
05:30
user that can log in with administrator access to the different accounts.
05:33
It said it was gonna send us an email so that we could set up our password So here's my
05:38
invitation to my IAM user Sam and I'm gonna accept this invitation And I now should be able to
05:44
set up that user password Okay So make sure you choose a really good password again This account
05:48
does still have admin access to those different AWS accounts So my account has been successfully
05:53
created Now it's gonna ask me to log in I'm just gonna put in that username the password that I
05:59
just created Yeah This trusted device And now here it's gonna ask me to do two FA again So again
06:04
you can use the same app or the same thing as before but this is a different two factor
06:09
authentication step So I am gonna use a security key again and I'll be using saying my hardware
06:15
key There we go Okay So again no one can log in to this account without my flipper here And now
06:20
I get to see this dashboard So this is all of my accounts Here's my management account at the
06:24
top my development playground and production account They're all right here And the way I access
06:29
this is through that custom URL So I set mine up to be cloud course dot AWS apps dot com slash
06:34
start So anytime I wanna log into my account I'm just gonna go straight to this URL And if I go
06:39
to that and I'm already logged in it should just present me with the different accounts that I
06:42
can choose from or I'll have to log in So I'll just enter my IIM username and password should
06:49
hit me with that two fact to auth page um once I let myself in, I should now see those accounts
06:55
again So this is how you'll get into your accounts You just go through that custom URL log in
07:00
and then you get to access each of these individual accounts So if I wanted to right now I go
07:04
into my playground account, and I'll actually show that again So each of these shows what
07:08
permissions I have So I'm gonna log in to any of these with administrator access.
07:12
And as soon as I click on that and go into the account I'm in AWS So here I am in the playground
07:17
account And if I close this and actually wanted to open up the production account, I can click
07:21
this link and now I'm in the AWS console for my production account So I have a single login,
07:26
and I've set up the permission so that I can use that login to log in to each of these accounts
07:31
And these accounts are really just for organizing my infrastructure If I put something in
07:34
production I don't delete it If I put into playground I can delete I can do whatever I want
07:37
There's actually one more thing we need to enable from the root account before we can continue
07:41
So I am gonna log out here and just go to AWS dot com so I can log in with my root account one
07:47
more time And this is gonna be the email address we initially set up for the root account And
07:51
we're gonna go up to the top corner and select your account name and then click on account right
07:57
here in the root account Now we need to scroll down I think it's close to the bottom here Right
08:01
here it says I am user and role access to billing information.
08:04
And without this being enabled the I'm users in the management account and the playground
08:09
production development account won't actually be able to see any of the billing information in
08:13
those accounts So if we come over here and click edit and activate I'm access We're gonna update
08:19
this and now we'll actually be able to see the individual billing information for those accounts
08:24
when we're logged into those accounts So now if I go to my normal access panel and try to access
08:29
my accounts using IAM I'll be able to see the billing for of these accounts So I'm coming back
08:34
to this after I've already set up the route fifty three stuff So if I go to my playground
08:38
account I can go to the billing and cost management section and I should
08:42
see that it's charging me fifty cents within this playground account.
08:46
So each of the accounts I'll be able to see the individual billing and cost management for these
08:50
But if I go to the management account now and I go to billing and cost management within the
08:55
management account I should be able to see billing for all my accounts So that's a little bit
08:59
more hits It's my route fifty three zones for both of those different accounts So if you're
09:02
having trouble seeing your billing information in these accounts log back into the root and make sure that you've enabled it for IAM users