EC2 Options in Depth

Before we setup setup a basic EC2 instance, let's take a deeper look at the options we have when configuring our instances.

Some of these topics will be covered in much more details in other parts of the course, but this should give you a good starting point.
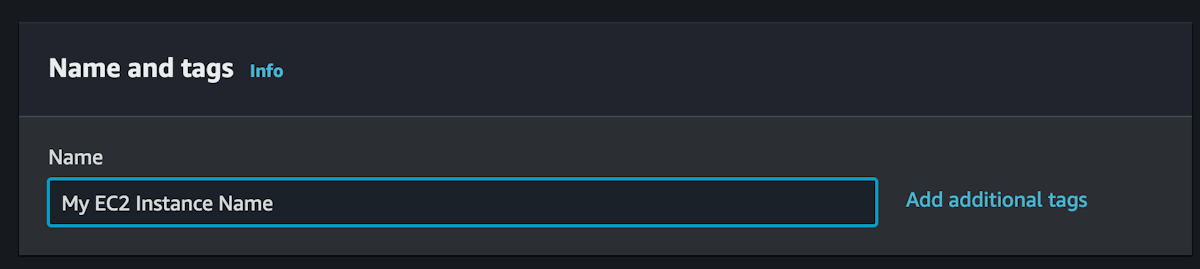
Tags

Tags are just metadata that you can add to your EC2 instances. I mostly ignore this except for the name. Always name your resources.

Application and OS Images (AMIs)

This is the base image that you use to launch your EC2 instance. In the quick start section, you can see good operating systems to choose from.

Let's say we want to start a new Ubuntu instance. I can check that and then see that it's selected Ubuntu server 24 which is currently the latest version.

But if we select this dropdown, we can see other versions of Ubuntu, and images with SQL Server installed, or this one with Nvidia drivers installed that's pre-configured for ML tasks.

Or we can search through third-party images here and I could find a server pre-configured to run Ruby on Rails on Ubuntu 20.

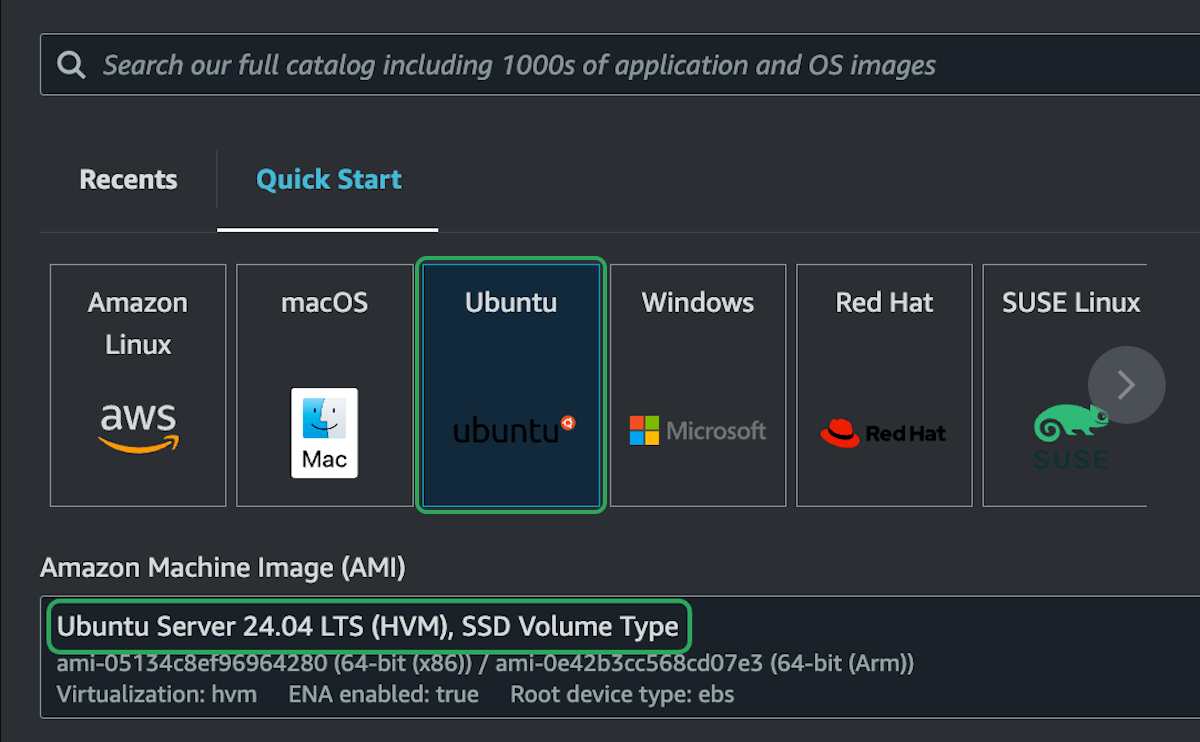
Or we could create our own custom images, with some custom configurations, and deploy instances from those.

We'll get into much more detail about custom images in a later section. For now, let's just start with one of the quick start operating systems.

Linux will always be the cheapest option, and it's what most people use, so we'll really only focus on Linux. However, you can set up a Windows or Mac instance.

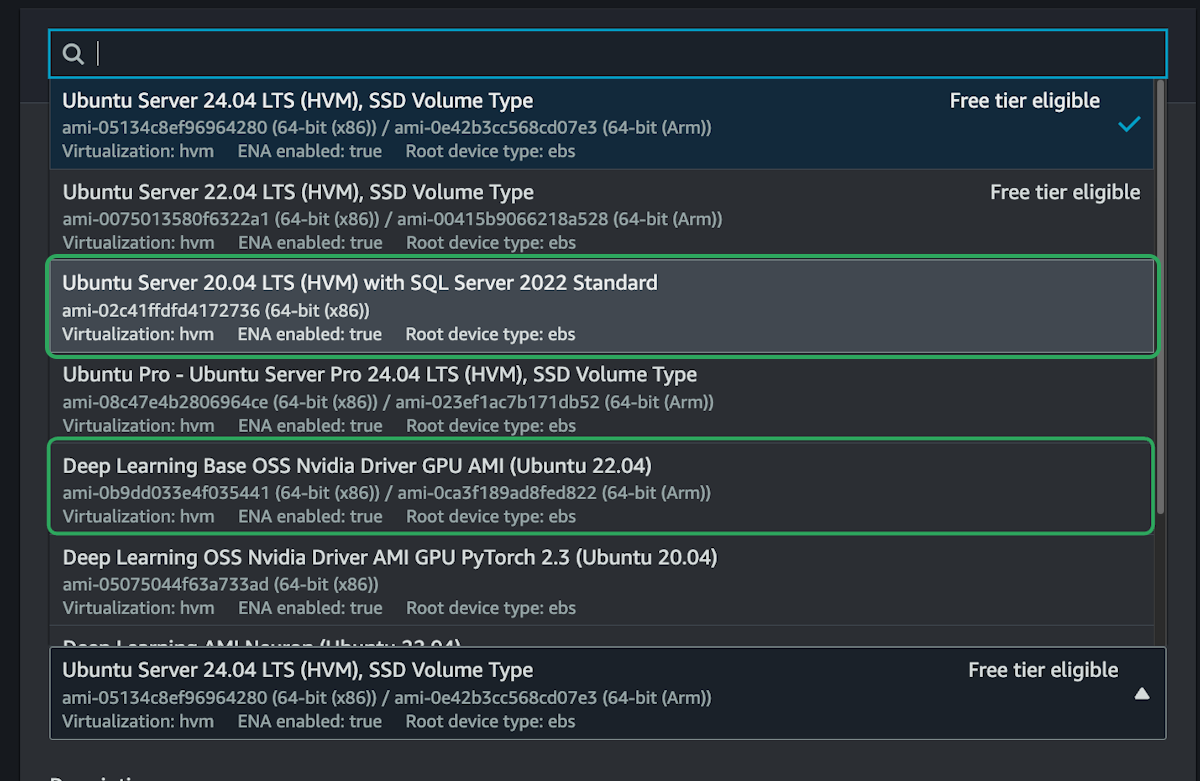
Out of all the Linux distros, Ubuntu is probably the most popular, meaning it's easiest to find help online when you run into issues. So we'll use Ubuntu server 24.04 LTS.

However, there are other versions of Linux you can choose from, including Amazon Linux, which is a distribution developed and maintained by AWS specifically for use in cloud environments. This can also be a good choice when starting out, but you won't find this option on other cloud providers.

Instance Types

By default, the t2.micro type is selected with:

  • 1 virtual CPU
  • 1 GiB Memory
  • around 0.0116 USD per hour

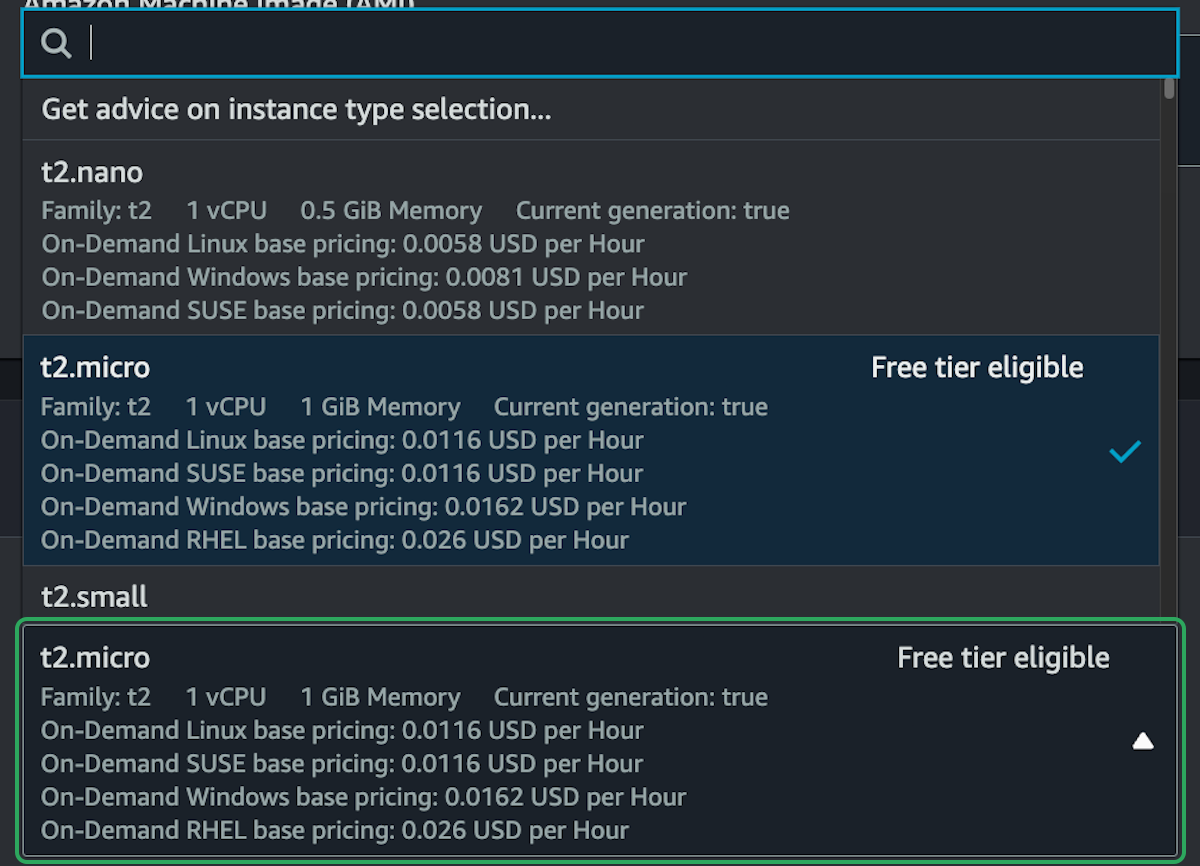
That may not seem like a lot, because it isn't. It's a small instance that doesn't cost much, around $8.5 USD a month. But even though it's small, it's probably more than you need most of the time.

If you select the dropdown menu, or select compare instance types, you can take a look at over 800 different instance types that you can choose from. Here are two ends of the instance spectrum:

t2.nano

"Burstable Performance" instances

  • 1vCPU
  • 0.5GiB of memory
  • 0.0116 USD per hour
  • Low to Moderate Network performance (maybe a few hundred Mbps)
u7in-32tb.224xlarge

"Ultra High Memory" instance

  • 896 vCPU
  • 12288 GiB memory
  • 152.88 USD per Hour
  • 200 Gigabit Network performance
Show timestamps
00:00
Before we actually set up a new EC2 instance, I
00:03
want to take a look at all the different options we have in the web dashboard.
00:07
So I'm logged into AWS right now. I'm going to head over to the EC2 dashboard.
00:11
If we click on Instances, I don't have any running right
00:15
now, but if I were to launch a new instance—I'm not actually going to launch one—
00:18
We're just gonna go through all the options, because right here on this dashboard, we'll be able to see every option we have.
00:23
We'll go into more detail about some of these in future parts, but it's just good to get a little overview right now.
00:28
So, the first thing we see are the name and tags. This is just where you can add metadata about the instance.
00:34
So generally, I'll just always add a name. Like if we were setting up a web server, we could
00:38
call it "my web server," or something like that.
00:40
00:45
Then right here we have Application and OS Images.
00:48
This is Amazon Machine Images—or you'll often hear them referred to as AMIs.
00:52
This is where we get all the base operating systems that we're probably used to.
00:55
So there's a bunch of Linux instances, there's Windows,
00:58
and there's even Mac if we wanted. And Amazon has its own flavor
01:01
of Linux, but usually I tend to gravitate towards Ubuntu.
01:05
And if we select a Linux distribution, we can see it's already selected
01:09
Ubuntu Server 24, which I guess is the latest version.
01:13
And in this dropdown, there are actually a few different options. There are some with SQL Server pre-installed,
01:19
some with NVIDIA GPUs, or we could even scroll up a little and search through a bunch of base images.
01:25
So let's say I wanted to set up a Ruby on Rails application.
01:30
I could search for images, but there are no default Quick Start images from AWS.
01:34
But if we went into the Marketplace here, other people have created public images we could use, like this one.
01:40
So I could set up an EC2 instance from this image, and it would come with all the things I
01:45
need to run a Ruby on Rails app pre-installed.
01:48
So these images contain both the base operating system and any preconfigured software and tools that we want on it.
01:55
And we can create our own images—and we will do that in later sections—because this can be a
02:00
really effective way to horizontally scale our applications.
02:03
We can create an image that contains everything we need to run our web app or service.
02:08
And then when we want to horizontally scale, we just create new EC2 instances from that image.
02:12
And that's what an image is for: we create an instance from an image. But for the most part
02:16
in the beginning here, I'm going to head back because we're just going to start from these Quick Start images.
02:21
So we'll just get Ubuntu, for example, and it will just be kind of the plain Ubuntu image
02:25
with not too many bells and whistles pre-installed on it.
02:27
… Then if we scroll
02:34
down a little bit right here, we can select the architecture.
02:37
So by default, it's selected x86 and that's probably fine, but you can also select an ARM instance.
02:43
And if your workload can run on an ARM instance, that's usually a better choice because they
02:49
are a little bit faster and cheaper than the x86 versions.
02:53
So if I select ARM here in the architecture menu, then below I can select the instance type.
02:59
And Amazon has about 850, I think, different instance types—so there's tons.
03:04
If I select from this dropdown, we can scroll for a really long time.
03:08
You can see there are just tons of instance types here. And this is the configuration for the actual virtual machine.
03:13
So right here, I can see the t4g.nano—there's a lot going on here with the naming conventions.
03:19
T is for "burstable"—we'll get into that in a later part. 4g is the fourth generation
03:23
Graviton processor, which is AWS's own ARM processor that they've built.
03:28
And it's really awesome. It's fast and cheap. Then "nano" is the size of the instance.
03:32
And there is a lot going on here. Most people don't understand all the different instance types, and that's fine.
03:37
There is a new link up here, Get Advice, where I think you can actually
03:42
tell AWS what kind of workload you're going to be
03:45
running, and it will give you advice on the type of instance you need.
03:49
You can even compare all the instance types, but I'm just going to go over some basics for now.
03:53
So the t4g.nano right here I can see has two
03:57
virtual CPUs and 0.5 gibibytes of memory.
04:00
And that's gibibytes—which is 2 to the power of 30 bytes—just slightly over
04:06
and more accurate than gigabytes, but essentially the same thing.
04:10
So, that might not seem like a lot—two virtual
04:13
CPUs and half a gibibyte of memory—and it isn't a lot.
04:18
It is a very small instance, but it might be sufficient for most of your workloads.
04:21
Like, I could definitely deploy a web app on an instance like this.
04:24
And right here we can see the Linux base pricing, which is $0.0042 USD per hour.
04:31
So if we were to take a look at that—let's say $0.0042 times 24 hours in a day,
04:37
and let's just say there are 31 days in a month—if we left it running all month, it would cost us $3.12.
04:43
And then if we wanted something slightly bigger, like 1 gibibyte of
04:46
memory, then that looks like it would end up costing us double the price.
04:50
So that's $6.24 per month.
04:54
So you can scroll through these and see all the different resources that you might get and the different prices it'll cost you.
04:59
If you pay more, you get more resources; if you pay less, you get less resources.
05:03
And on the lower end of things are the T instances. I'll talk about T instances in
05:09
a later section because they're considered burstable instances and there's a little bit more to them.
05:13
But these are the smaller instances, they're very affordable, and we get the t2.micro in the free tier.
05:18
I'll look at that in a second. On the other end of the spectrum, we can get things like a p5.
05:24
So let's see, p5.48xlarge.
05:28
And I'm just going to open up the EC2 instance types page here.
05:31
So we've got general purpose instances, then—scroll down—to accelerated computing.
05:36
Here's where the p5s are. I just want to show you the contrast. The p5, the one I just
05:41
selected—the 48xlarge—has eight H100 GPUs in it, 192
05:46
virtual CPUs, 2 tebibytes of memory—so a ton of memory.
05:53
These instances are insanely big. You could run a full LLM on them.
05:57
You could do tons of AI work, and that's kind of what they're used for.
06:00
But if we go back and look at that instance again, we can see the price here is up to—let's see.
06:06
Linux base pricing, $98.32 per hour.
06:11
And if we select this instance, we have to have it for a minimum of one day.
06:14
So this is not cheap. These instances are huge—on the other end of the spectrum.
06:17
They cost a lot of money. But again, we can just pick and choose what we want.
06:20
If we want to spend less and get less resources, that's what we get. If we spend more, we can get a ridiculous amount of resources.
06:26
So, pretty much any type of workload you want to run, you can run on an EC2 instance.
06:31
And this is grayed out right now, because this doesn't support ARM. This would only
06:34
be available if we switch back to x86.
06:37
And then I think I'd be able to select that instance—though I have to select it for at least one day.
06:44
And I actually can't select this instance because it's too big for what I'm currently allowed to use.
06:49
So I'd actually have to request access to be able to use these instances.
06:52
But if I was really dedicated to some AI training, that’s exactly what I would end up doing.
06:57
But I'm going to bring this back now because if we're trying to use the free tier, we are going to
07:01
have to use the t2 or t3.micro.
07:05
These are the cheaper ones. Here we go, so this is free tier eligible—the t2.micro—
07:09
which means that we get 750 hours of it for free per month for the first year that we have our account.
07:14
And you can see the on-demand Linux pricing right there: $0.0116
07:17
times 24, times 31.
07:22
So this would cost us around $8.60. Generally, if I wasn't in the free
07:26
tier, I would use the t4gs, the ARM processors, because they're a bit cheaper.
07:30
But this is essentially what we're getting for free each month: it's one virtual
07:33
CPU, one gibibyte of memory, and it's running on x86.
07:37
So my general advice would be: use a smaller instance until you need to use a bigger instance.
07:41
But also, you can use the Get Advice link or Compare Instance link to really see all the
07:46
different instance types and select which one would be best for your workload.
07:50
Then if we scroll down to the next section, there's key pair login.
07:53
So generally with a Linux instance, we'll log in using SSH.
07:56
So this would be our SSH key. Or if we were using a Windows instance, we would log in with RDP.
08:02
And again, this would be our key pair to make sure that we can log in securely and remotely over the Internet to our instances.
08:08
We don't have one set up yet. We'll set that up in the next part, where we actually deploy an
08:11
EC2 instance… Then we're on to the network settings.
08:20
And right here, it has default settings already selected, and this might be sufficient for a lot of workloads.
08:25
But if we edit the network settings, we can really take control of how the network for this is configured.
08:32
And right here at the top, it says "VPC required," and there is this default VPC.
08:36
This is a Virtual Private Cloud that exists within every region in AWS.
08:41
In a later section, we are going to set up our own custom VPCs, and these are essentially
08:46
custom virtual networks that we set up in AWS.
08:50
So we'll set up our own private IP ranges and subnets, and we'll put those in different
08:56
availability zones and have our own virtualized private network that we deploy compute to.
09:01
But by default, we just have this default VPC and that's fine for now.
09:04
When we select a subnet, we are selecting the subnet, the network environment that it's going
09:09
into, but also we select the availability zone that that is in.
09:13
So if you see here, this is in availability zone us-west-2a because I'm in us-west-2.
09:18
And that was actually something I should have started with. You're going to deploy an EC2 instance to a region.
09:22
So first, before you do anything, you should select the correct region. I default to us-west-2.
09:26
That's generally what I use because it's closer to me. You'd start by selecting your region.
09:30
And then, like I said, in the VPC that we're selecting, I can select a subnet.
09:33
And these are the different availability zones. So there's a, b, c, and d.
09:38
So these are all the different availability zones that we can put the EC2 instance into.
09:42
And if we were horizontally scaling an application, we'd want to make sure that we distribute
09:46
those across different availability zones for redundancy—just in case anything bad happens to a single AZ.
09:51
So I can just select any of these; it doesn't really matter. I'm gonna go with 2a. Then we
09:55
can auto-assign a public IPv4 address.
09:58
And the default VPC is set up by default to only work with IPv4.
10:02
You can do an IPv6 VPC or a dual stack that works with IPv4 and IPv6,
10:07
but this one is just for IPv4. So this will enable and give us an IPv4 address by default.
10:12
IPv4 addresses are not free. AWS charges for an IPv4 address no matter what the circumstances are.
10:18
They used to only charge you if you had an IPv4 and weren't using it.
10:22
Now, they just charge you no matter what. And the price for an IPv4 address
10:27
is $0.05 per IP address per hour.
10:31
So that would be an extra $3.72 just for
10:35
the IPv4 address on top of the EC2 instance—which isn't great.
10:39
This is just for IPv4. You could use only IPv6,
10:43
but in my experience about 50% of the Internet doesn't work with IPv6 yet.
10:46
So that's not great. But there are other ways around this.
10:50
We'll get to some of those later on. Just know that this will cost money.
10:53
You do get 750 hours of an IPv4 address on the free tier.
10:57
So as long as we make sure we don't exceed the free tier hours, we won't have to pay for this.
11:01
But it is something to note that on top of the EC2 instance, you do have to pay for the IPv4
11:05
address. But we will be needing that because we need to be able to connect to our instance and
11:08
our instance needs to be able to connect to the Internet…
11:15
Then down here, there's this Security Group section, and this is
11:19
basically the virtual firewall for the individual instance.
11:22
So if we were creating a new security group right now, we would specify all the different rules for this firewall.
11:29
So I would specify which port I'm opening on the EC2 instance and what is allowed to connect over that port.
11:35
So right now, by default, it's selected port 22 for SSH, and it's also selected "from anywhere."
11:40
So as long as I have an SSH key, it doesn't matter where I am—this instance will allow me to log into it using SSH.
11:47
And if I wanted to be a little bit more secure, which I suggest if you can, you
11:51
could select "My IP" because SSH isn't something that anyone should be able to do from anywhere.
11:56
This is maybe something I limit to a certain set of IP
11:59
addresses just to make sure no one can try and hack into my instance.
12:02
But if you're just testing things out and you're working from different places, "Anywhere" is probably fine.
12:06
Then we could add more rules. So let's say I set up an HTTP server.
12:10
I would set up another rule for HTTP—that's port 80.
12:13
And if it's a public server, I would obviously want anyone to be able to connect over port 80.
12:17
And I would also set that up with HTTPS, which would be port 443.
12:21
Again, I would set that up from anywhere. So, you just specify—you limit how people are able to
12:25
connect to the instance. You can also specify outbound rules—what your instance is allowed to connect to.
12:29
We'll get more into this in the VPC section, where we're configuring a bunch of different
12:33
infrastructure and really want to refine those rules to make sure we
12:37
specify exactly how each piece of infrastructure can communicate with everything else.
12:41
Then if we scroll down, we're able to configure some advanced network configuration.
12:46
This is the network interface within the instance, the private IP addresses, things like that.
12:52
We're mostly just going to leave this stuff alone, but you do have a lot of control over what you can configure within the EC2 instance.
12:58
And you can even add multiple network interfaces to have multiple private IP addresses and communicate in different ways.
13:03
But again, we're going to mostly just leave that alone… Then we have configure storage.
13:12
And by default, it's giving us one 8-gigabyte gp3 root volume.
13:18
This essentially means we're getting around 8 gigabytes of SSD for the EC2 instance.
13:23
So we configure storage and the virtual machine separately from each other.
13:27
This is Elastic Block Store—so we can look at the EBS
13:31
pricing page, Elastic Block Store pricing page, and see the different options and how much they cost.
13:35
gp3—this is the most standard one, and this is what's selected by default on this page.
13:39
So gp3 is going to be fine for the most part. You can just leave this alone.
13:42
You don't have to configure this at all. By default, yeah, this is SSD.
13:46
It's general purpose SSD. We pay $0.08 per gigabyte a month.
13:50
Then there are some different limits and prices on how many IOPS we have.
13:54
So that's like reads and writes to disk, and how much throughput bandwidth we have to the SSD.
13:59
These are probably sufficient, but if you did want a higher guaranteed IOPS or higher
14:05
bandwidth to your Elastic Block Store, you can pay more and get a specialized type of volume.
14:11
But for the most part, we really don't need to worry about these. We are just going to select gp3.
14:16
And on the free tier, we get 30 gigabytes per month free.
14:19
So we could up this to 30 if we wanted to and still be within the free tier.
14:23
But 8 is probably more than we need. If we want to set up
14:26
multiple EC2 instances at once, we might want to limit how much we're actually using there.
14:30
So by default, we have this root volume, but we're also able to add
14:34
other volumes to this EC2 instance, so we can write to either volume.
14:38
And we could even write a bunch of stuff to one volume, detach that from this
14:42
EC2 instance, and then attach it to a different EC2 instance later on.
14:45
But for the most part, one volume is going to be all we need. This is EBS—Elastic Block Store.
14:50
You're going to get a root volume with each EC2 instance. You can attach multiple volumes,
14:55
but there's also this thing called Elastic File Store, EFS.
14:58
This is about three times the cost of EBS, but it works a little differently in that
15:03
it exists on its own and you can have multiple EC2 instances
15:06
connect to the Elastic File System and use it as a shared file system.
15:10
So this could be handy, for example, if you wanted one place to store your database data and
15:15
you wanted a bunch of instances to be able to run queries, or any scenario where you
15:19
have a bunch of compute that all has to access the same file storage.
15:23
But this is a little more expensive. On the other side of things, the cheaper option
15:27
would be to use S3 for storage, since that's one of the cheapest options to store things.
15:31
But that's not a file system, so if you really needed a file system, you might want to opt for this.
15:35
But we're never going to use EFS in this course. Just good to know that it exists
15:39
15:44
Then we get to the advanced details section of the EC2 instance.
15:48
Some of these are important, some not so much. I'll go quickly through the ones that aren't super important and slow down where it matters.
15:54
So "Domain join directory"—this only matters if you're working with Active Directory.
15:58
IAM instance profile—this is important because it's how we
16:01
specify permissions to different parts of our AWS infrastructure.
16:06
So if I wanted my EC2 instance to be able to communicate with an S3 bucket or be able
16:10
to write logs to CloudWatch Logs within AWS, I would set up an IAM instance profile, attach it
16:15
to the EC2 instance here, and that would then give it permission to access other services
16:20
within AWS—because by default, everything's locked down.
16:23
So this is going to be incredibly important, especially in the IAM section where we want
16:26
our instances to communicate with other services within AWS.
16:30
An EC2 instance can have an IP address, but it can also have a host name.
16:33
This can be handy—some internal services prefer to communicate over a full domain name.
16:39
So, this creates a host name for the EC2 instance. We could connect over the IPv4
16:43
address, but we could also connect using a fully qualified domain name.
16:47
If we have a DNS name set up for the host name, we'll essentially
16:50
end up with a fully qualified domain name that looks something like this.
16:54
It would be based on the IP address of the EC2 instance. You can have a
16:57
public one and a private one, but it'll be a fully qualified domain name.
17:00
Then there's instance auto-recovery. By default, if something goes wrong with our
17:05
instance, AWS will just automatically reboot it—maybe on different hardware if there's something wrong with it.
17:11
Shutdown behavior—this defaults to stopping the instance.
17:15
So if we shut down our EC2 instance, that's just going to stop it—turn it
17:18
off, like if we had a computer at home and just hit the power switch.
17:22
We're not paying for compute capacity anymore, but we still have that instance.
17:26
It still exists, so we're still going to pay for the block storage device that's attached to it.
17:31
We're still going to pay for the IPv4 address, but we don't pay for any compute power.
17:35
If we choose to terminate the instance, it would be completely gone and we would never be
17:39
able to restart it. This is generally what we'll want to do when we're playing around with EC2 instances.
17:44
We want to terminate it. The default shutdown behavior can be "stop," but we do want to note that
17:47
there's a difference between stopping an instance (just turning it off), and completely terminating it and having it be gone forever.
17:52
There's hibernate behavior. We can have it stop the instance and keep all the contents of RAM,
17:58
so we can restart the instance and essentially have it pick up where it left off.
18:01
There's terminate protection. If we enable this, we won’t be able to terminate the instance unless we disable this first.
18:07
So, a little bit of protection. "Stop protection" is the same thing, but instead of terminate, it's just if we wanted to stop the instance.
18:12
Detailed CloudWatch monitoring sends extra stats about the EC2 instance and extra logs to the CloudWatch service.
18:18
This costs a bit more money, so we're never going to enable this. But we'll look at
18:22
CloudWatch and how to get the default metrics that are free in CloudWatch, and how we can review those and CloudWatch Logs.
18:27
Credit specification—this is for the T instances. We'll talk more about that in a later part.
18:32
Placement groups can be useful if we want to set up multiple EC2 instances in one availability zone, and make sure they're physically close to each other.
18:39
This probably doesn't matter too much, but some workloads really need
18:42
to make sure their instances are as close to each other as possible, for the fastest networking.
18:48
You can pay extra for EBS optimized instances so they communicate with EBS faster.
18:53
You can get more bandwidth for those if you want to pay more. There are spot instances if you
18:58
want to pay less—but AWS might just terminate your instance whenever they want.
19:02
There are capacity blocks—this is more if you need to reserve capacity,
19:05
especially if you're doing AI workloads where there's a limited number of GPUs.
19:08
You might need to reserve those ahead of time if you want a lot of them and need to make sure they're definitely available for your company.
19:13
Tenancy—you can actually have your EC2 instance run on your own dedicated piece of hardware.
19:19
So AWS will make sure your EC2 instance is the only thing running on that physical
19:23
hardware—which is sometimes required for compliance, or you might just want the entire server to yourself.
19:28
You can specify the RAM disk ID or the kernel ID.
19:31
We're never going to do that. Nitro Enclaves allow you to create compute
19:35
environments to process extra sensitive data if you need.
19:39
You can bring your own license for things that require one, like if you're running Microsoft SQL Server.
19:44
You can configure CPU options a bit further, if you need to add or remove vCPUs.
19:50
You're able to access metadata about the EC2 instance using HTTP endpoints from within the instance.
19:55
This is enabled by default—and you can just leave it—but you could disable this if you wanted.
19:59
And then at the very bottom, there is user data.
20:02
And this one is interesting because this is code
20:06
you can write that will run the very first time an instance is launched.
20:10
So I could just start typing a bash script in here if I wanted to.
20:13
#!/bin/bash And I could run something like, "sudo apt update" and, uh, let's go
20:20
"sudo apt install nginx".
20:23
So by default, this would be a base Ubuntu instance. But now, just by injecting this
20:29
little bit of code in here, as soon as the instance starts up for the first time, it will
20:34
run this code and update and install Nginx on this instance.
20:38
I don’t find it that useful to run code in here.
20:41
Sometimes it can be handy for updating environment variables,
20:44
but for installing and configuring the instance, usually we'll do that another way.
20:48
We can do it manually and create an image from that, or we can use something like Packer to create an image and then deploy from that.
20:53
But this is an option, and it’s worth noting that you can inject user data into an EC2 instance.
20:58
And then I guess there's a summary at the bottom where we can see everything and specify how many instances we want to launch.
21:03
So if I launched three instances right now, it's just going to create three identical instances based on all the settings I've configured there.
21:09
All of this is—a lot. There are a lot of options here, and for the most part, we can ignore most of them.
21:14
We're going to dive in-depth into some of those options throughout the
21:18
course, but I just wanted to give you a high-level overview of all the different options you have.
21:21
I hope the takeaway is that you can really configure your EC2 instance as much as you want.
21:26
You really have a lot of control over how you set up these instances.
21:31
And in the next section, we're just going to set up a basic one. We'll see how simple it can be to set up the most basic instance.
21:36
We'll set up a Linux instance, install some software on it, and if you want to get more
21:40
advanced—if you want more fine-grained control—AWS gives us the options to deploy however we want.
Cloud Course
Cloud Course
$89.70
$299.00 Lifetime
  • 81+ learning resources
  • 57 lessons and tutorials
  • 15 hands-on deployments
  • 9 quizzes
  • 29 videos (4h 17m 38s)
  • More content coming soon
  • Unlimited lifetime access to all course content
  • Deployment assessment CLI tool
  • Exclusive Discord access
Original Price:$299.00
Discount:-$209.30
Total:$89.70