EC2 MySQL

We are now going to setup a database on an EC2 instance. This concepts apply to most databases, but we're going to use MySQL in this example.

Setup The EC2 Instance

step 1:

Create a new EC2 instance for the MySQL server

Create a new EC2 instance for the MySQL server

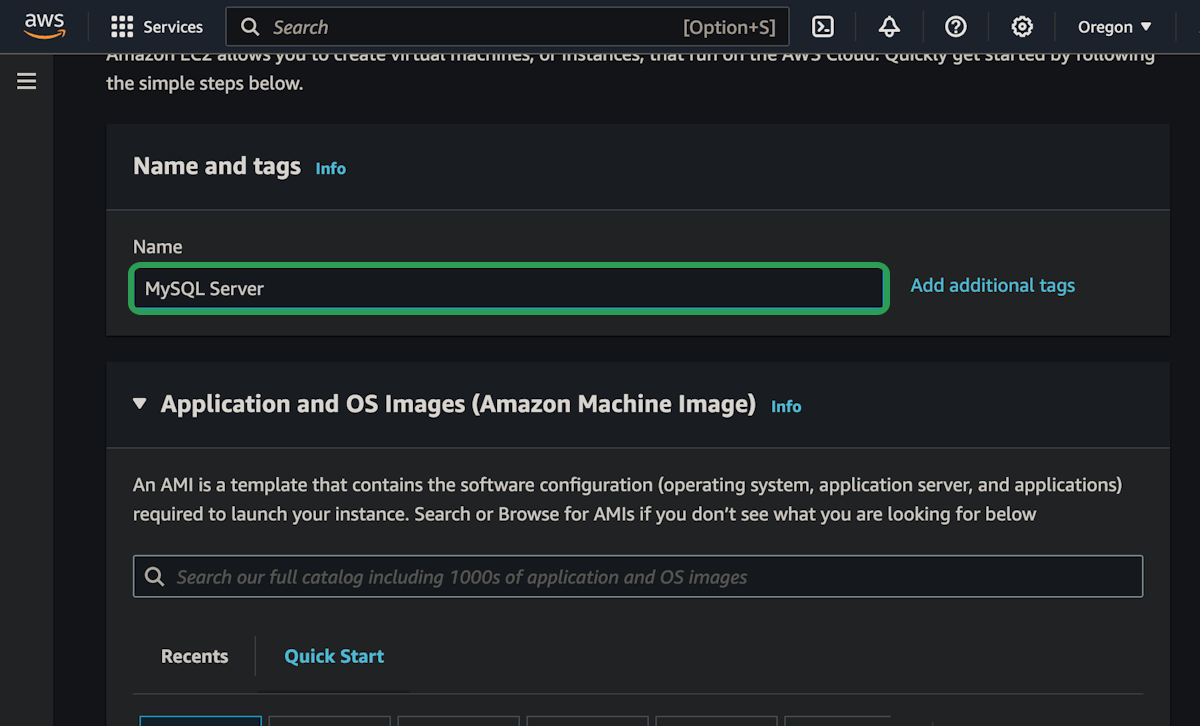
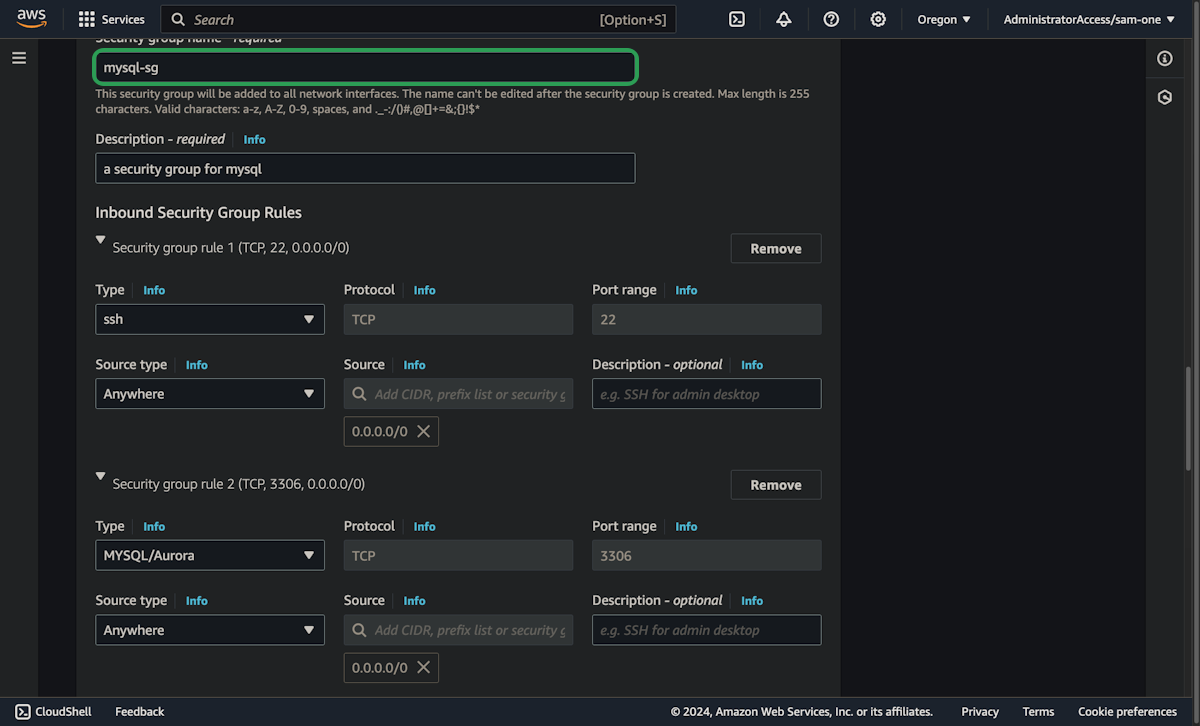
Most of the setting will be the same that we've been using for the other instances, but the security group will be different.

In a lot of cases, we will restrict which IP addresses can access a database instance. We might only let processes on the same instance access the database, or other instances that we setup in a private network on AWS (more about that in the VPC section).

It's generally the most important part of the infrastructure and we need to keep it secure, so we really wan't to avoid opening up the database port to the public.

That being said, sometimes we need to be able to access a database over the public internet, and it's makes this demonstration slightly easier, so we will be allowing connections on port 3306 from anywhere.

Just try to avoid this unless it's absolutely necessary.

step 2:

Update the security group to allow traffic on port 22 for SSH and 3306 for MySQL

Update the security group to allow traffic on port 22 for SSH and 3306 for MySQL
step 3:

Once we're logged in to the EC2 instance, update and upgrade

sudo apt update && sudo apt upgrade -y

Install MySQL

step 4:

Install MySQL

sudo apt install mysql-server -y

This will install the most recent stable version of the MySQL server and client that exists in the official Ubuntu repositories. As of writing this, the major version is 8.

step 5:

Run the security script to adjust default settings:

sudo mysql_secure_installation

Follow the prompts like this:

Show timestamps
00:00
Our basic web app is going to need a database and realistically you can set up any database you want
00:05
on an EC2 instance. You have complete control but for this example we are going to be using a
00:11
MySQL database and generally I would say always use a relational database at least in the beginning
00:17
of an application but these concepts do apply to other databases and you could easily switch this
00:21
out for something like Postgres but I will be using MySQL. So the first thing we're going to do
00:26
is open up the Playground account and we're going to set up a brand new EC2 instance to set up a
00:32
MySQL database on. So I'm going to go to EC2 and instances and launch an instance. This is going to
00:38
be the same as the last one in a lot of ways except this is going to be for MySQL database
00:43
but we're still going to use Ubuntu 24.04 on a T2 micro right there. The key pair again is going to
00:52
be the same but for the network settings I'm actually going to click the edit button.
00:56
We want to make some custom changes here so I do want ssh and I'm going to limit this to just my
01:02
IP address but you can leave that open if you want we're just experimenting right now and then we're
01:06
going to add a security group rule to allow connections to the MySQL database over the
01:11
public internet and most of the time we probably won't do this. We'll probably have the database
01:17
set up on an instance where the application is accessing it privately on the instance
01:21
or we could have the database on an EC2 instance or many EC2 instances
01:26
and have a private network in AWS where our application is the only thing that can access
01:30
the database but for this example we're just going to see what it would be like to create a database
01:35
that we can access over the public internet. So we're going to set up a new rule for MySQL which
01:40
I think is 3306 right here yeah 3306 and we're going to allow this from anywhere. This isn't super
01:47
secure but it is good for this example and for storage for a database we probably would want more
01:53
storage but eight is fine for this example and that is good so I'm going to launch this instance
01:58
and we're going to do the same as before I'm going to select the instance click on connect once it's
02:05
actually deployed it's still pending okay so now I'll click connect go to ssh client just because
02:09
I want to copy the ssh code go back into terminal and modify this path to go to my dot ssh directory
02:17
and connect to that new ubuntu instance yes and again we're going to do the same as last time I'm
02:23
going to update and upgrade this instance just so everything is up to date and once that's done
02:28
we are going to sudo app install mysql server and I need to spell that correctly there we go
02:38
and this is going to install the most up-to-date mysql server that is in the official ubuntu
02:44
repository and I think that's version 8 point something right now and now that's done I am
02:49
going to check the version let's see there we go
02:53
my version is 8.0.42 so that's pretty good and then we're going to sudo mysql secure
03:00
installation to make the settings for this a little bit more secure this
03:05
improves password security we're going to say yes we want strong password validation so I'm
03:12
going to select two we want to remove anonymous users so we define how we can log in the root
03:19
user can only log in through localhost so we won't actually be able to log in over the public internet
03:23
the root user yes that's good remove the test database and we'll reload the privileges table
03:29
so that's now a little bit more secure setup of mysql and now we should be able to log in
03:35
as the root user using sudo mysql so we can only do this from localhost we have to log in with the
03:40
ssh key and then we can access the database as the root user this way so now we can start running
03:46
commands I'm gonna select user and host from mysql dot user I'm going
03:53
to see these are the default users that we have we're logged in as root so this seems to be working
03:58
and now we're just going to set up a little bit of a test database so we can play around with mysql
04:03
so I'm going to create a database called random facts and we're going to put in a bunch of random
04:09
facts but I'm not going to do this as the root user instead what I'm going to do is set up
04:14
different users that will be able to access the different databases that I create within
04:18
mysql so I have the database random facts I'm going to create
04:23
user I'm going to call this local user because this user is only going to be able to access the
04:28
database from localhost and later on we can create a user that will be able to access the database
04:32
over the public internet so this will be local user at localhost identified by and then we have
04:39
to enter a strong password so I'm going to use strong password one two three exclamation mark
04:43
because that is a strong enough password for our settings so we should now have a local user
04:49
right there that can access the database over localhost and now we're going to give
04:53
user permission to access just the random facts database so grant all privileges on random facts
05:03
actually I remember I wanted to call this random facts db so I'm going to create a database random
05:10
underscore facts underscore db still as the root user I'm going to drop the database that
05:17
I created before which was just random facts and now I'm going to grant all privileges
05:23
on random facts db all the tables in there to local user at localhost so I have my database
05:34
random facts db I have my user local user and that user is able to access the random facts db
05:41
in any way they want so I can create tables I can delete tables I can insert data select whatever I
05:46
want so now I'm going to flush the privileges to make sure that's all updated and then I'll exit
05:52
my sql so now I should be able to log into my sql from localhost using my local user and entering in
06:02
strong password one two three no I think I got the password wrong let's see strong password there we
06:09
go okay so I'm now logged in as that local user and if I show databases databases uh I can see
06:17
there's my random facts db that I am able to access so let's use random facts db random facts
06:22
db and now anything I do now will be on that database so let's set up a table and insert some
06:27
data and for this I'm actually going to copy straight from the page so where are we here we
06:32
go okay so I'm going to create this table create table facts that just has an id and a fact super
06:38
super simple table so that has now created the table if I show tables I can see I have a single
06:43
fax table and then we're going to insert a bunch of random facts into this so I'm
06:47
going to paste this insert into statement and we have a bunch of facts and we can test this out
06:52
with a random select statement so this will select a fact from the facts table and just
06:58
select a random one you are more likely to be bitten by a human than a shark a flock of crows
07:03
is known as a murder sloths can hold their breath longer than dolphins can I wrote this and I still
07:09
did not know all of these facts okay flamingos is called a flamboyance anyway so if I had uh
07:16
some software running on this ec2 instance maybe it's a web app or something else I can use this
07:22
local user I can create other users that has specific permissions that can access this
07:26
database running on ec2 but let's say I want to access this ec2 instance over the public internet
07:32
like I want to access it from my personal machine or I have a server set up somewhere else and it
07:36
needs to access this and it's not on localhost basically so what I can do is I'm going to exit
07:41
this and right now our database is kind of locked down to only be accessed on localhost because that
07:46
is a good default setting but we can go and modify the mysql configuration
07:52
file so I'm just going to copy this using vim and we're going to set this up so that it binds
07:59
to any address it allows any address to connect to it and then we can set up a user that can access
08:04
this over the public internet so right now it's only allowing over localhost but if I change this
08:11
we are going to allow connections from anywhere again most the time you don't really want to do
08:15
this unless you have to but for experimenting it's pretty good so I'm going to save that file save
08:22
and then we're going to sudo systemctl restart mysql and now I'm going to sudo mysql because I
08:30
want to log in again with the root user and I'm going to create a new user I'll call this public
08:36
user and this is going to be able to access the database from anywhere so we're going to use a
08:41
percent sign for this this is any ip address this user is going to be able to access the
08:46
database from and again I'll say uh identified by and I'm going to use that same stronghold
08:52
password so we now have a private user and a public user but I still need to grant all privileges
09:00
or maybe I could just grant read privileges so only the public user is able to read the data but
09:04
not update the database or insert data that's completely up to you but I'm going to grant all
09:08
privileges on random facts db dot star to public user at percent there we go should be able to
09:20
access that from anywhere and do what I'm going to do I'm going to create a new user and I'm going
09:22
to do whatever it wants on the random facts db again I'll flush those privileges and I'm going
09:28
to exit out of this and we should be able to log in from localhost still so mysql you uh public
09:35
user this user should be able to access from anywhere and the password is that strong password
09:42
one two three so the public user can access this database from the ec2 instance but this also means
09:48
that if I open up a terminal anywhere so I'm going to do this on my local machine which is
09:52
canada this server is in oregon I should still be able to access it using a mysql client so I'm
09:57
just going to use the mysql cli as the client to access this so if I go mysql dash u public
10:03
user dash p for password and dash h this is going to be the host name so I'm going to go back to my
10:10
instance over here I'm going to select the instance id and I'm going to grab that public ipv4 address
10:15
so copy that and paste it into here so the host is that ec2 instance public user and then I'll
10:22
have to enter that strong password one two three and I am now connected to that mysql database
10:27
running on the ec2 instance in oregon from my local machine and just to contrast this if I
10:32
tried to access this using my private user same password it won't allow me it's saying
10:40
the uh I'm not authenticated I'm not authenticated to access from the private
10:44
user from anywhere in the world that's only allowed over localhost but my public user
10:48
good to access the database from anywhere so again I could have this user inside of some
10:52
software inside of an application accessing this database from anywhere and just to make
10:55
sure it's really working let's yeah select some more facts you know what's funny I bananas are
11:02
berries but strawberries aren't I also heard that avocados are berries it's just ridiculous facts so
11:07
that's uh basic mysql setup let's see if we've done this correctly so cloud course this was the
11:14
ec2 mysql using the playground account just have the mysql database running expected to ingress
11:22
rules found three I gave it three why do I keep messing up the ingress rules okay let's go back
11:26
let's make sure it should not have three ingress rules let's go security inbound rules oh yeah
11:32
I'm allowing it over ipv6 again I didn't even realize that okay so I'm gonna head over to the
11:39
security group and let's edit the inbound rules and I'm gonna delete the ipv6 one and save those
11:46
rules now we could allow connections over ipv6 there's not really much wrong with that uh it's
11:52
just for this I've made the requirements so we're only going to access it over ipv4 and if that were
11:57
a requirement you would have to know to come in update the security groups to allow exactly the
12:02
rules that are needed for that specific task so again this is really easy we can come in we can
12:08
modify this security group whenever we want I just want those two rules and we're going to come back
12:13
in here and make sure that that works now so ec2 mysql gonna go to playground account mysql database
12:21
and it looks like everything has been set up correctly perfect and now you can terminate
12:27
this ec2 instance if you want we're done with that part but I am going to go over in the next video
12:33
just some security best practices that you can add to this database
12:38
especially since it's being accessed over the public internet
Cloud Course
Cloud Course
$89.70
$299.00 Lifetime
  • 81+ learning resources
  • 57 lessons and tutorials
  • 15 hands-on deployments
  • 9 quizzes
  • 29 videos (4h 17m 38s)
  • More content coming soon
  • Unlimited lifetime access to all course content
  • Deployment assessment CLI tool
  • Exclusive Discord access
Original Price:$299.00
Discount:-$209.30
Total:$89.70