EC2 Web Server
In this part, we'll setup a basic HTTP server on an EC2 instance. No web logic or server applications, just a simple http server that can serve static files, like html.
There are a few different options we have here, like nginx or apache, but we're going to use a more simple and modern server called caddy.
Setup The EC2 Instance
We'll start by creating an EC2 instance.
step 1:
step 2:
step 3:

step 4:
step 5:
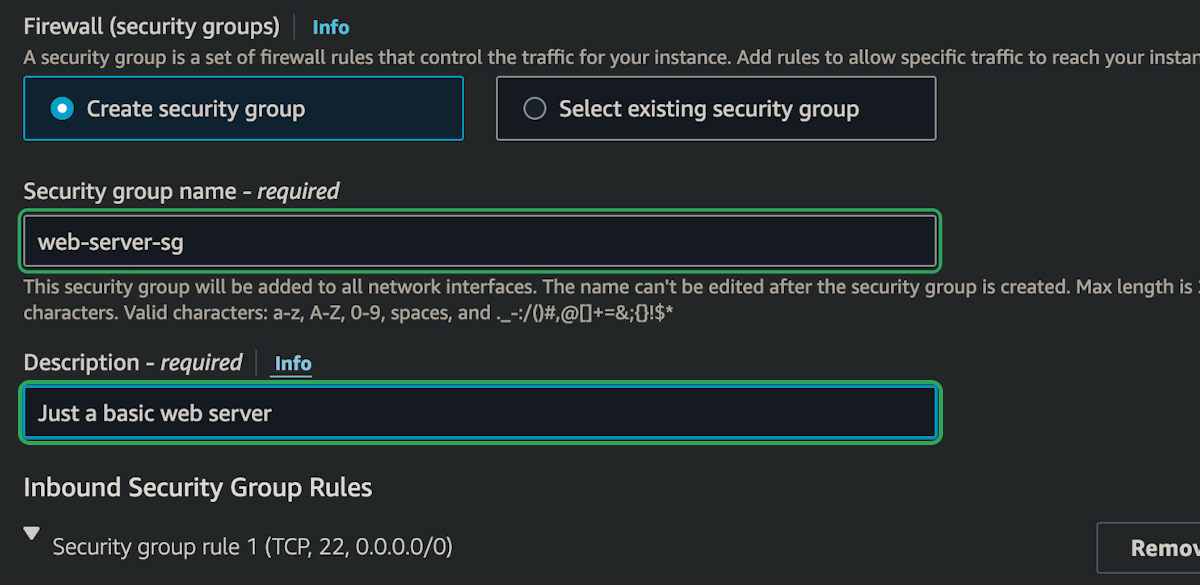
This is the easiest way to customize the security group. Since this is going to be a basic HTTP server, we're going to have three rules:
- SSH: 22
- HTTP: 80
- HTTPS: 443
step 6:
step 7:
The SSH rule is already setup, so we just need to add the other two rules.
Show timestamps
00:00
We're going to start by setting up a really basic HTTP
00:03
server that's just going to serve up some static text.
00:07
And then later on, we'll use this as a reverse proxy for our application.
00:11
There are a few different options for popular HTTP servers.
00:14
NGINX is definitely a favorite, but we're going to use Caddy because it
00:18
makes it really easy to configure as a reverse proxy and also set up TLS certificates for HTTPS.
00:24
So I'm going to head over to AWS and select the playground
00:28
account for this. I'll be using US West 2, Oregon, just because that's close to me.
00:32
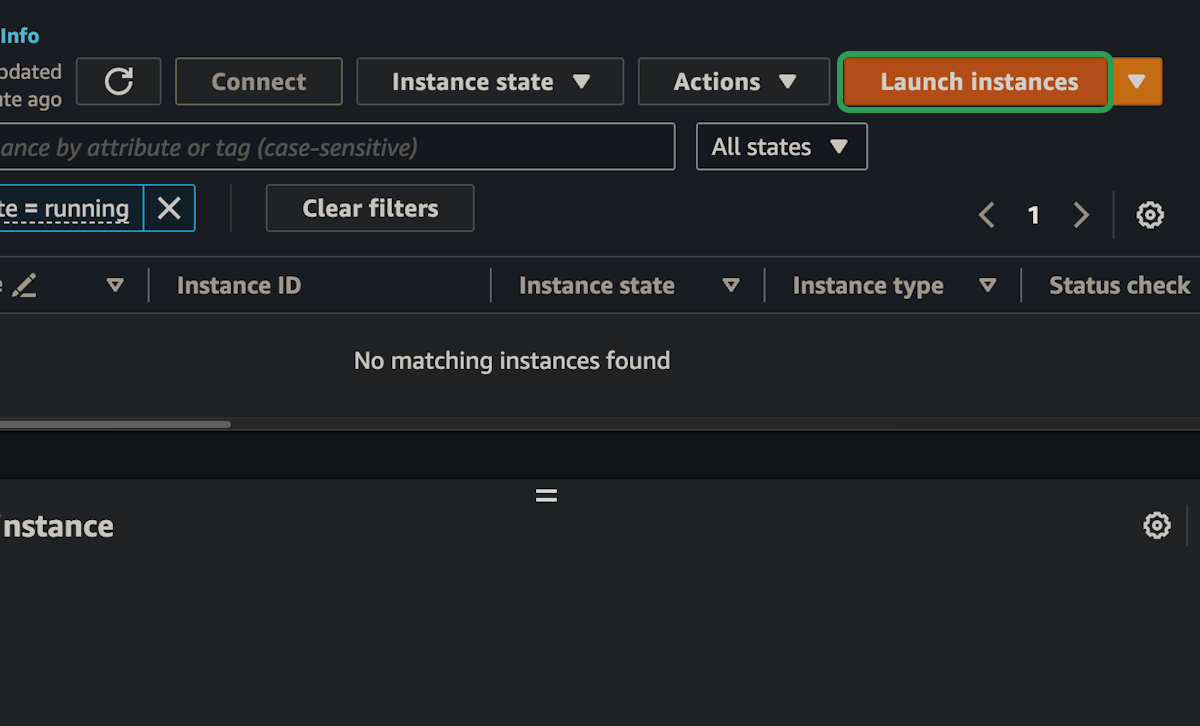
You can choose whichever region you want. I'll go to Instances and launch an instance.
00:37
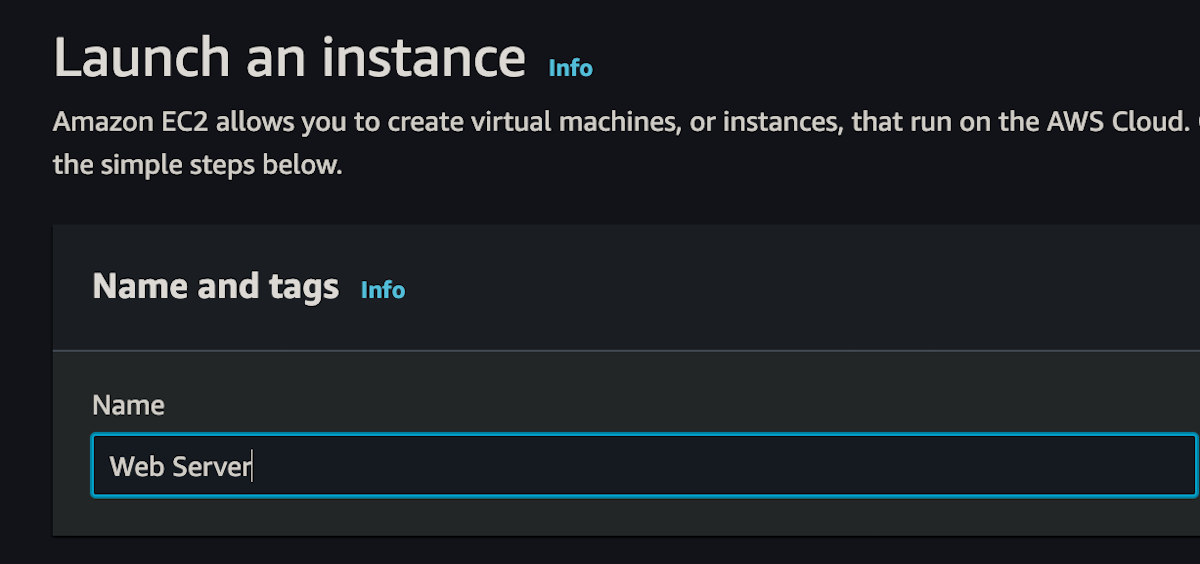
This is going to be for the web server, so I'll just call it "web server" and we're
00:41
going to select Ubuntu and use 24.04 LTS.
00:46
And again, we'll use x86 because we can use the t2.micro, which is in the free tier.
00:52
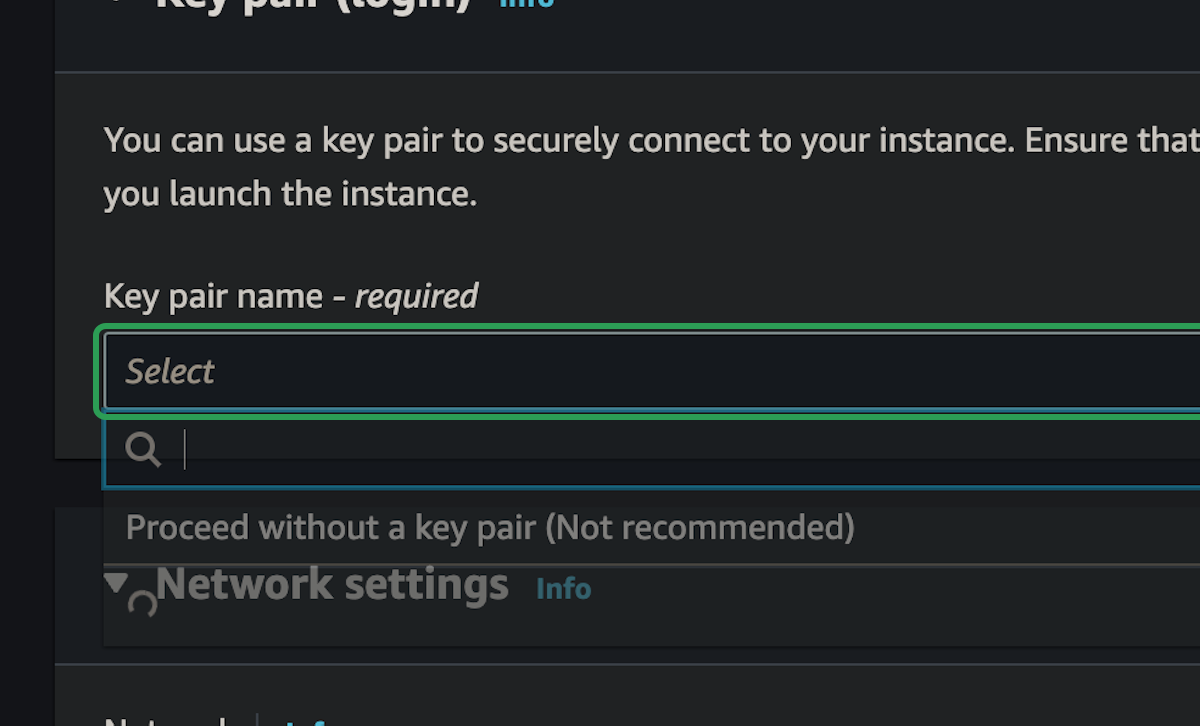
For the key pair login, I'm just going to use the same key pair I set up before.
00:55
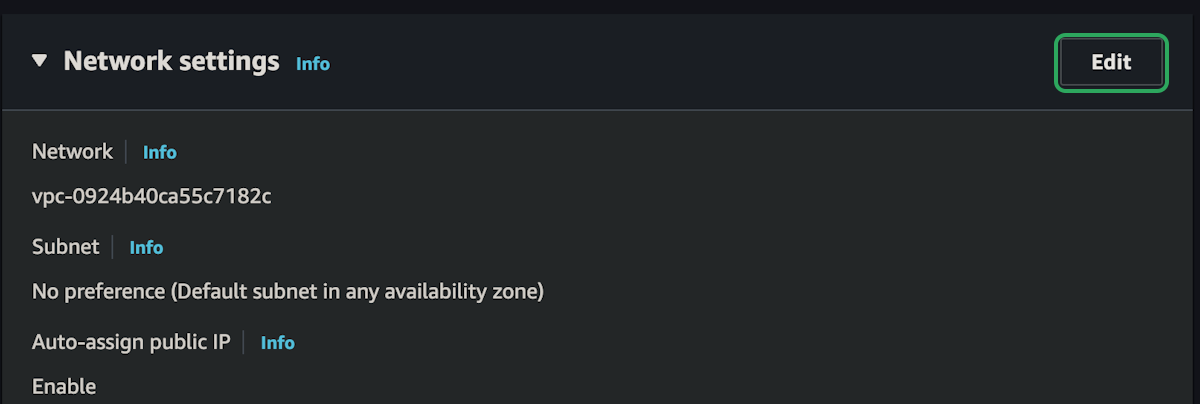
And for the network settings, I want to log in using SSH, which is already selected here.
00:59
I could just select my IP address, which would make this
01:03
more secure, because then login is limited to where I am right now.
01:07
Other people wouldn't be able to log in with SSH, but you can leave this open if you want.
01:11
We're also going to allow traffic over HTTPS and HTTP since this is a web server.
01:16
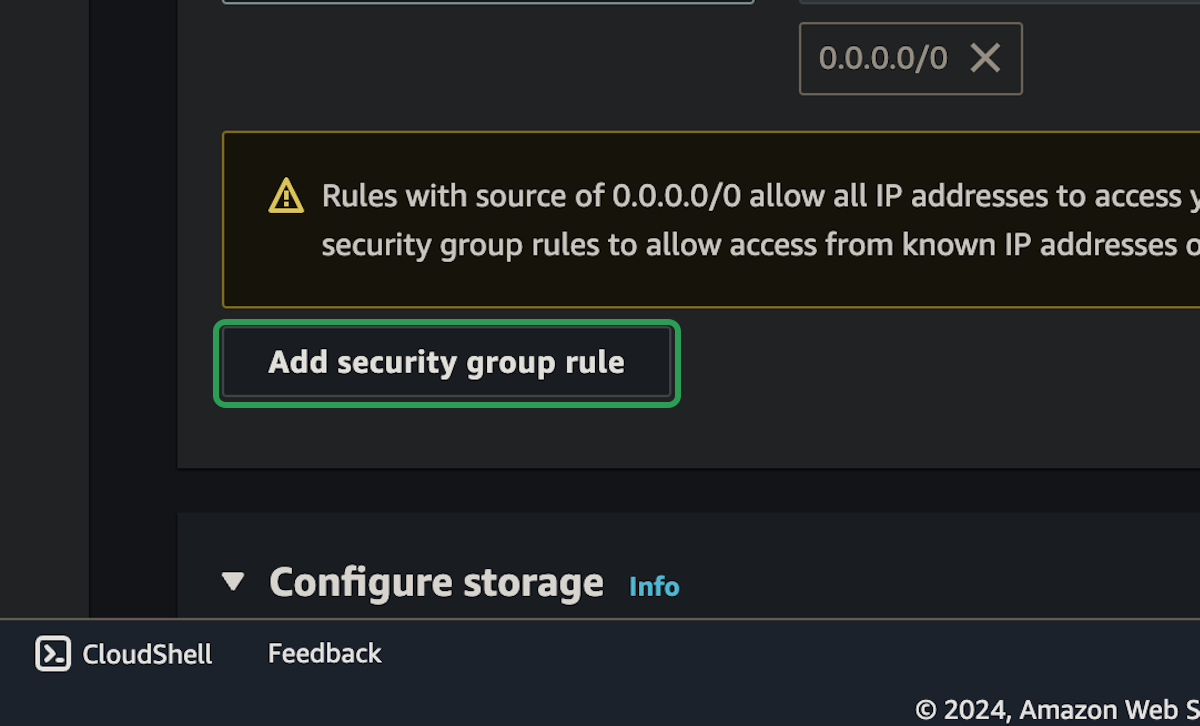
We want people to actually be able to access it over the public Internet. If we wanted more
01:20
rules, we could select Edit here and customize the VPC and security group rules a bit
01:25
more, but this is completely sufficient for what we're doing with this HTTP server.
01:29
As for storage, eight gigabytes is more than enough, so that's fine.
01:33
And I'll click Launch Instance. Once that's launched, I'm going to select the instance and
01:38
then click Connect so I can copy the SSH client command here.
01:42
So I can copy this ssh -i, and I'm going to open a terminal window, paste that in, and
01:47
the only thing I need to change is that the key is in my .ssh directory.
01:52
So this should log me into that Ubuntu instance we just made.
01:56
Yes, I want to connect. And here we are – we're in the Ubuntu instance now.
02:00
The first thing we should do when setting up a new instance is to sudo
02:05
apt update and upgrade just to make sure everything is up to date.
02:09
This can take a couple of minutes, so you might want to let it run and come back in about five minutes.
02:14
While we're waiting for that, I'm going to head back to the instructions because when we
02:17
install Caddy, we can check out all the instructions on the Caddy website.
02:21
So this is an HTTP server, it's a reverse proxy
02:24
as well, and all the documentation you need is on caddyserver.com.
02:28
You can read through this and get familiar with it, but we're just going to
02:31
use the instructions here to install it on our own Ubuntu machine.
02:36
Once that's done – which it is now – we can paste this in and
02:40
that should install the Caddy web server for us on the Ubuntu instance.
02:44
Now I should be able to sudo systemctl
02:48
status caddy just to see if it's actually running. And yeah, it's active, it's running.
02:52
So we should actually be able to make a curl request to localhost, and this is the Caddy landing page.
02:58
Obviously, it looks terrible in the terminal, but if I go back over to the instance here…
03:03
I'm going to select the instance we set up and grab the public IPv4 address,
03:08
copy that, and open it in a new tab.
03:11
Just continue to the site, and here you go. So I can see that over the public Internet, I can access
03:15
this HTTP server running on the EC2 instance and see the Caddy landing page.
03:20
We're going to be using systemd throughout the course, so just make sure you're familiar
03:25
with sudo systemctl, so we can use that to stop
03:29
Caddy if we want to, and now we shouldn't be able to make requests anymore.
03:33
We can use it to start Caddy back up.
03:36
We can use it to, uh, restart or reload Caddy if we make any changes.
03:42
And we can use journalctl to view the logs for Caddy if we want to–or for any
03:48
application that we're running with systemd. We'll run our own application using systemd a little later on.
03:53
But for now, let's just update the Caddy web server.
03:57
So instead of getting that default landing page, we get something custom.
04:00
I'm going to sudo vim /etc/caddy/Caddyfile.
04:06
This is the default configuration file for Caddy. You can see that if we access it over
04:10
port 80, it's acting as a file server and serving up
04:13
whatever is in /usr/share/caddy, which is that landing page site.
04:17
But we can simplify this a lot by getting rid of all that code and having it just
04:23
respond with: "Hello from my Caddy EC2 web server."
04:30
Everything else in here is just comments. This part right here is the only important part.
04:34
So if we make a request on port 80, I just want it to respond with that text.
04:37
So I'll save this, and then if I sudo
04:41
systemctl reload caddy, it should make those changes.
04:46
Now if I make a request to localhost–and I spell localhost correctly–we get that response.
04:52
Hello from my Caddy EC2 web server. If I refresh in the web browser, that's exactly what I get.
04:56
This is a really basic web server. We're just having it respond with text right now, but let's customize this a bit more.
05:01
Let's actually create a custom HTML website and have it serve that up instead.
05:07
Like I said, the default landing page for Caddy is in /usr/share/caddy as the index.html.
05:14
So we're going to create our own directory and put an index.html in there.
05:17
So I'm going to mkdir -p /usr/share/caddy/
05:21
my-site.
05:25
And I need to use sudo because that's a privileged path, but I want to change
05:30
the permissions of just my-site so I can access it without sudo.
05:34
So I'm going to change the owner, chown, to
05:38
ubuntu because that's the user we're logged in as.
05:42
Now we'll just have normal permission to access that directory. So let's create
05:48
an index.html in that path.
05:51
I'm just going to use vim to create and edit this, and I'm just going to paste in some generic HTML.
05:57
That's some "Hello World" code, and I'll save that file.
06:00
I'll also put in a 404.html
06:03
for a "not found" page, just to show how we can use Caddy.
06:07
Again, I'm just going to paste in some generic 404 code here, and that's the
06:11
female shrugging emoji, which is kind of funny that it comes out like that.
06:15
Let's see what actually happens when we go to that page. Now I just need to modify the Caddyfile again.
06:22
Just sudo vim /etc/caddy/Caddyfile. I'm going to delete this block and
06:28
replace it with something I've already created.
06:31
So here again, we're going to listen on port 80 and serve files from the my-site directory.
06:37
By default, it's going to use the path to grab whichever file is there.
06:41
So by default, it'll serve up the index.html. But if there are any issues, we're going
06:46
to serve up the appropriate HTML file for the status code.
06:49
If something's not found, it'll serve up the 404 file. Again, just a really basic HTTP server for now.
06:55
So I'm going to save this and then sudo systemctl reload caddy.
07:00
Now if I curl localhost, I should see my hello world page.
07:05
And if I curl localhost/anything-that's-not-found, I'll get the 404 page.
07:11
Again, if I go to my web browser and reload this domain, there's the HTML file.
07:17
If I went to slash anything else, I'd get the 404 page.
07:21
So just a really basic HTTP server. Realistically, if I just had a static site like this, I
07:26
would most likely use S3 with CloudFront to serve it up.
07:29
But this just demonstrates how we can use an HTTP server like Caddy within an EC2 instance.
07:34
The next thing I want to do is use a custom domain name instead of the IP address.
07:40
On top of that, I want to be able to use a TLS certificate so we can use HTTPS instead of HTTP.
07:45
So what we're going to do now is go back into the AWS console, grab this public
07:50
IPv4 address for my current EC2 instance, and then we're going to head over to Route 53
07:55
to set up the DNS record for this EC2 instance.
07:59
I'm going to go into my Playground hosted zone–that's play.cloudcourse.xyz–
08:03
and we're going to create a new record.
08:07
And I'm actually going to switch to Quick Create now because that's much easier when I'm
08:12
just messing around with an EC2 instance or creating basic A records like we are here.
08:16
So I can choose any subdomain for this. Let's say, "my-static-site-1.play.cloudcourse.xyz".
08:23
I'm going to put in the IP address, and we're just using simple routing—the most basic record we can create.
08:28
Let's create that. If we come down here, I should be able to see my record—my-static-site-1.
08:34
I should probably clean up my other records or it'll get confusing, but it is pointing to the IP address of that EC2 instance.
08:39
So now if I just copy this and paste it into the browser—make sure you
08:44
continue to the site—it looks like it's using HTTP. Perfect. So I can now access my
08:47
website using the domain name instead of just the IP address, which is great.
08:51
I could go to slash, you know, whatever and I'll get the 404 page. That's cool.
08:55
But it's still using HTTP. And if I tried to use HTTPS, it just wouldn't work because Caddy
09:00
isn't going to accept requests on port 443, and we don't even have a TLS certificate.
09:04
So the next thing we're going to do is go into the EC2 instance and actually make sure HTTPS
09:08
works, but we're also going to forward any HTTP requests to
09:11
HTTPS on port 443 so that people can't access it over HTTP.
09:16
For that, it's really easy with Caddy, and that's one of the reasons I love using Caddy—
09:20
because if we open this up again and edit the Caddyfile,
09:23
all we need to do is replace this port
09:27
80 right here with the domain name we just set up in Route 53.
09:31
This is the entire domain for the record. It has to match exactly the record that I just made in Route 53.
09:38
Now if I just make that change, save the file, and reload Caddy again—
09:44
right now, if I check the logs—journalctl caddy (oops, misspelled Caddy),
09:51
I think we should be able to see that Caddy is using Let's Encrypt to actually set up the TLS
09:58
certificates and make sure those are valid.
10:01
And then behind the scenes, Caddy is going to make sure that anytime we make a request to port
10:05
80, it'll forward that to 443 and handle these TLS certificates for us.
10:09
This is really nice, because every time I've done this with NGINX, I've had to set up the certificates myself.
10:13
Caddy just does that all for us, and we can see exactly how it does that here.
10:17
That means I should now be able to refresh this, and it's using HTTPS.
10:23
And if I try to use HTTP, it's always going to forward that to
10:27
HTTPS, which is exactly the behavior that we want from an HTTP server.
10:30
Then I can check if I've done that correctly by opening up a
10:34
terminal window on my own machine and running CloudCore.
10:38
So this was the EC2 web server in my
10:41
Playground account, and I'm not logged in.
10:45
Okay, let's try that again. EC2 web server.
10:49
Playground account should only have one instance set up. Yep, there it is.
10:52
My web server. And it expected three ingress rules for my security group, but it found five.
10:58
That's interesting. So I'm going to head back over to my instance and see what's going on here because we only created those three ingress rules.
11:03
We had port 22 for SSH, port 80 for HTTP and port 443 for HTTPS.
11:09
So if I head back over to that instance
11:12
and we go to Security, here are my inbound rules.
11:16
Ah, I see. Okay, so we have it set up—by default, this did it for us.
11:21
When we created the instance and just checked the boxes for 443
11:24
and 80, AWS just set up these rules for us.
11:27
So I thought we were only setting up IPv4, but it looks like it set up IPv6 ports
11:33
as well, which is mostly fine, and you might even prefer that.
11:37
But in this case, I'm only setting up an A record that points to my EC2 instance.
11:43
I haven't set up an AAAA record, so I really have no use for the IPv6 addresses in this case.
11:48
So what I'll do, just to keep it simple, is go to the
11:52
security group and delete the IPv6 rules.
11:56
We just don't need them right now. We're not using them. It's also good for you to see how
12:01
you can create a security group when launching an EC2 instance, but also come in later
12:06
and modify it. You can really control this however you want, which is kind of nice.
12:11
So let's see—can I delete those rules?
12:14
I guess I have to edit the inbound rules, and then I can delete the
12:17
IPv6 ones—these two—and then I'll just leave these three alone.
12:21
So I'm going to save those rules. Now I can't access my instance with IPv6 anymore, which is fine.
12:26
Let's see if this works. EC2 web server.
12:29
Playground. There's my web server. Okay, it has only the three rules.
12:34
There we go. So everything has been set up correctly. Once you've done that, you know it's set up right.
12:39
Now, we have no use for this EC2 instance anymore.
12:43
You should go back into the instance
12:47
dashboard and make sure you terminate or delete this instance, because we're completely done with it now.
12:52
We just used it to practice setting up a Caddy web server, and we'll use that
12:56
information later on when we set up our basic web app.
12:59
I'm going to terminate this and go back to Route 53.
13:04
I think I still have that open in this tab, so I'm going to delete this record.
13:08
Delete my-static-site-1. Now I've cleaned
13:12
up everything from this deployment and we're ready to move on to the next one.