Basic EC2 Setup On Linux
In this part, we will create a new Linux EC2 instance, login to that instance using SSH, and run a basic NGINX server on it.
We won't go into the details until the next part, this is just to get a sense of what setting up an EC2 instance is like.
Setting up The Instance
step 1:
step 2:
step 3:
step 4:
step 5:
step 6:
step 7:
step 8:
step 9:
step 10:
Show timestamps
00:00
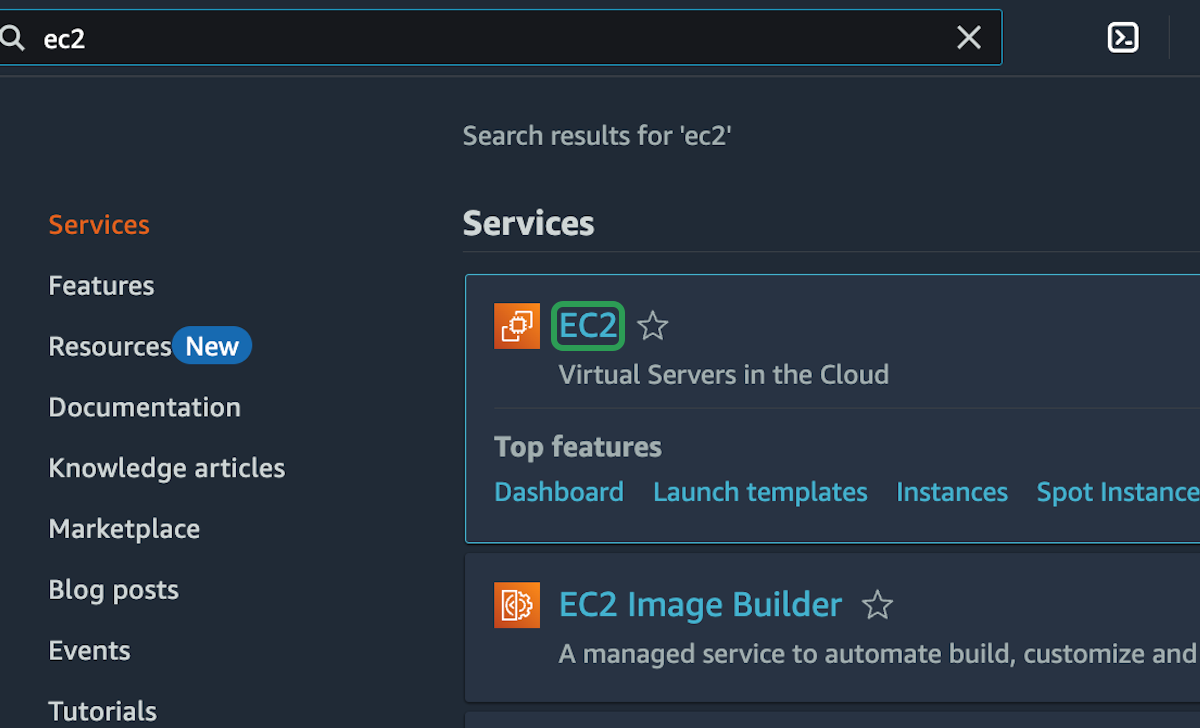
Now we're going to take a look at how to deploy an EC2 instance
00:03
by simply setting up an Ubuntu instance and installing NGINX on it.
00:07
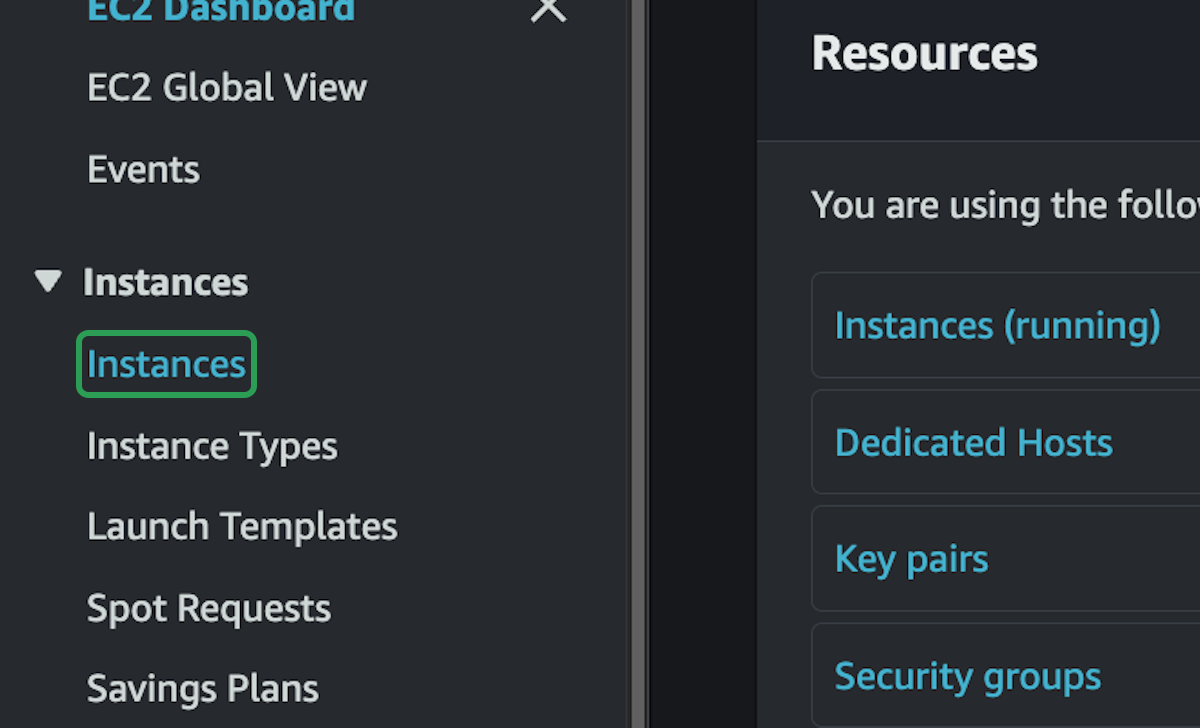
So I'm going to go into my Playground account, click on the EC2 dashboard, and then
00:13
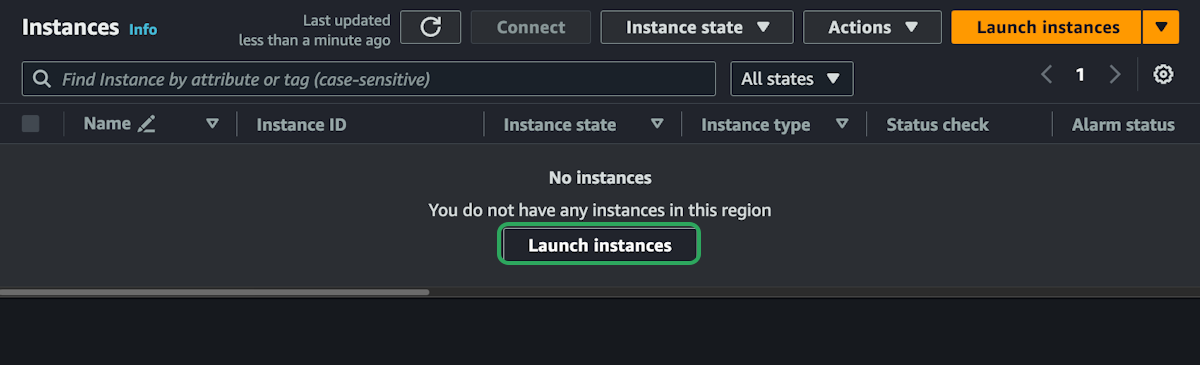
I'm going to select Instances just so we can see there aren't any instances here yet, but
00:17
we'll change that very soon because we're going to launch a new instance.
00:21
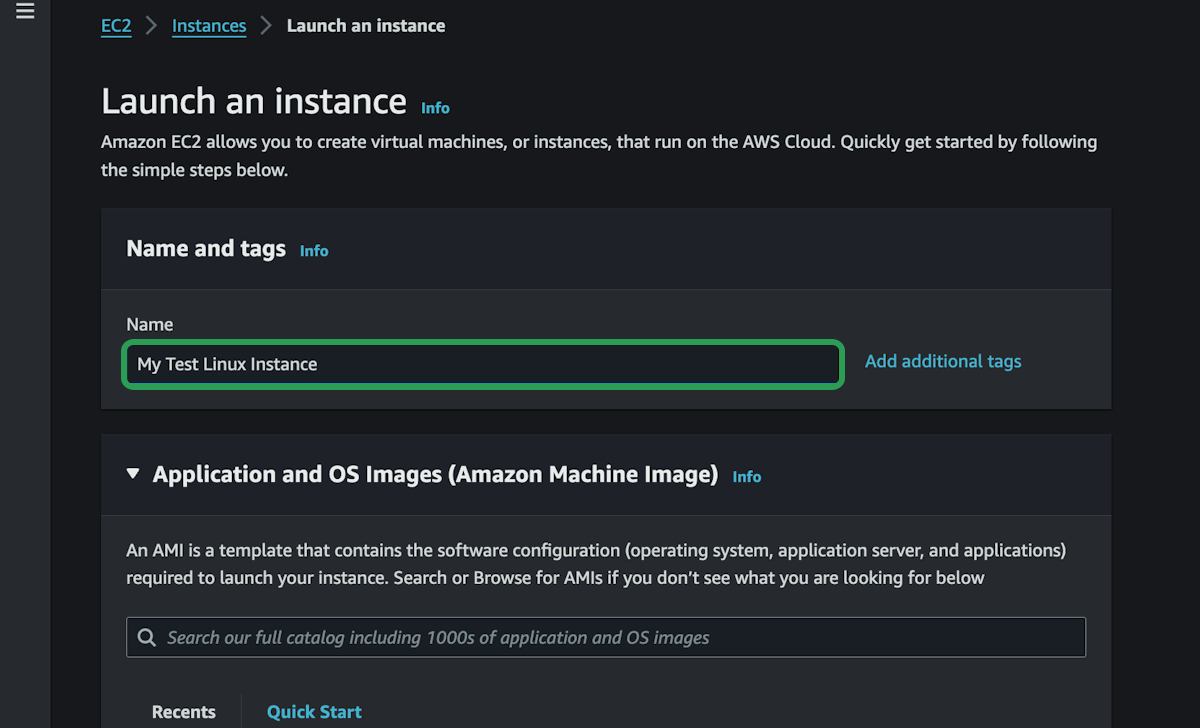
I'm just going to give this a name—test instance. We're going to tear it down pretty
00:25
quickly, but we'll see how easy it is to set up a quick Linux instance.
00:29
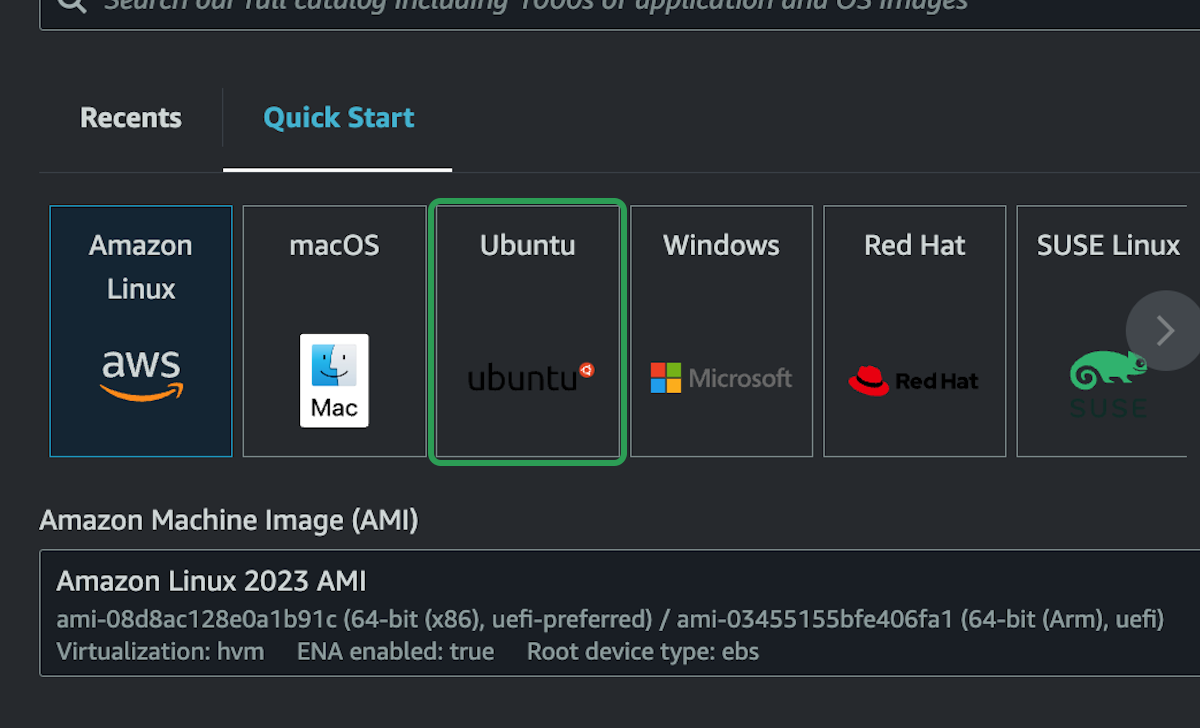
So I'm going to set up Ubuntu, and the main reason I'm using Ubuntu is because it has
00:34
the most support and the most online documentation and tutorials available.
00:38
You could use any distribution, really. Amazon Linux even has its own distribution, and that
00:42
works pretty well on EC2 instances, but I really don't think you can ever go wrong by selecting Ubuntu as your base image.
00:48
So we're going to do Ubuntu, and we'll leave this as the default 24.04 LTS.
00:52
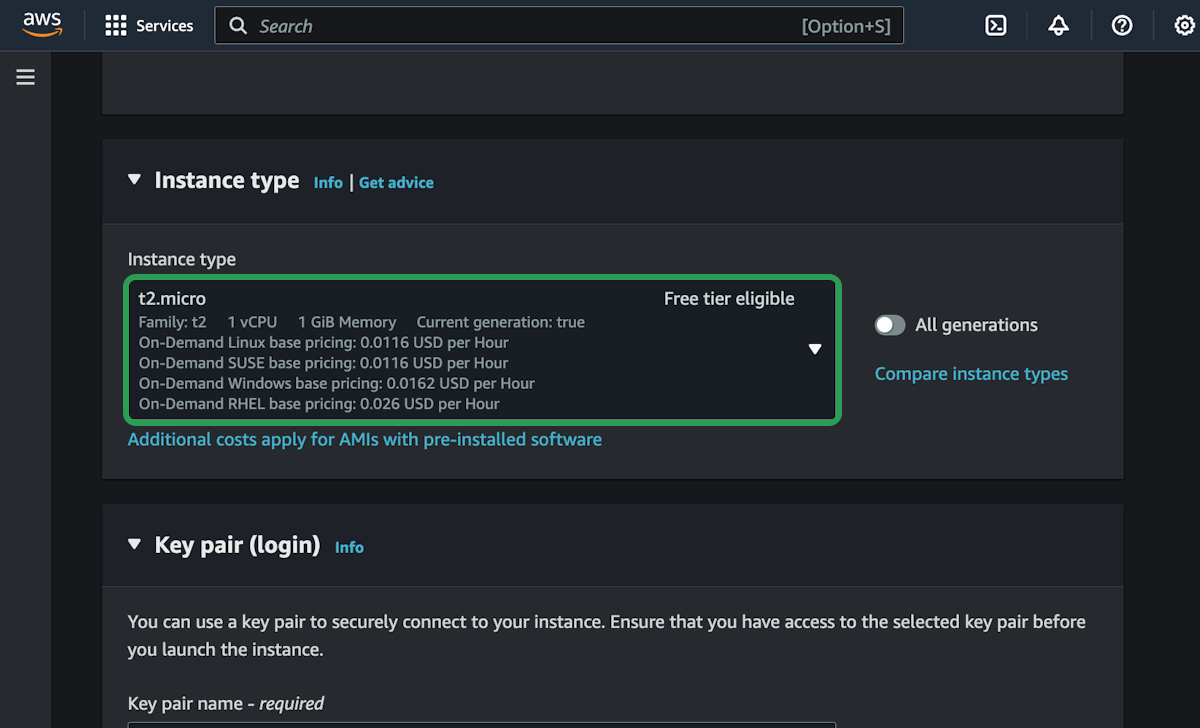
The architecture we're going to leave at x86 just so that
00:56
we can use the t2.micro because that's in the free tier.
00:59
Then we need a key pair, and you could set up a different key pair for each EC2 instance.
01:05
You can set up as many of these as you want, but realistically, for now, we only need one key pair.
01:10
So we're going to do this one time and then just reuse this key pair in the Playground account.
01:14
Each key pair is specific to a region.
01:18
So in this case, this key pair will only work for me in US
01:21
West 2, and I'm deploying this in US West 2 because it is closer to me.
01:24
We're going to be logging in with SSH, and the closer it is to you, the faster that network connection will be.
01:30
So for testing out these instances, the best bet is just to put it in a region that's close to you.
01:36
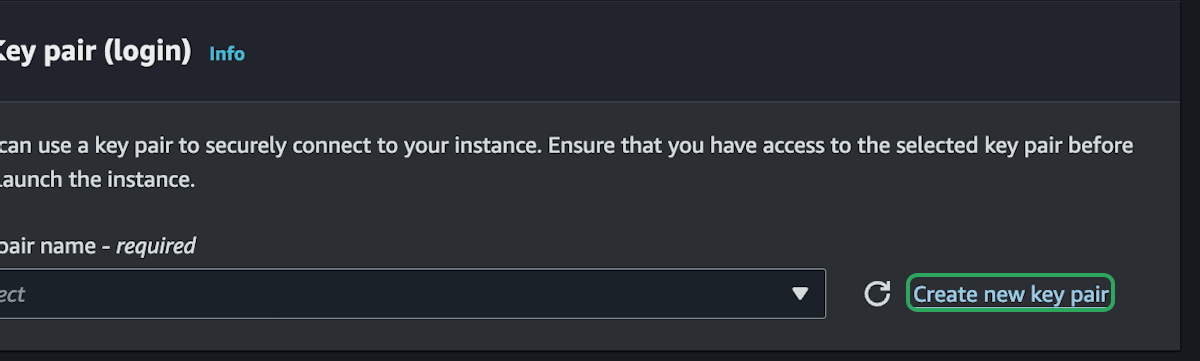
So for the key pair, like I said, we're going to have to create a key pair because currently there are no key pairs.
01:40
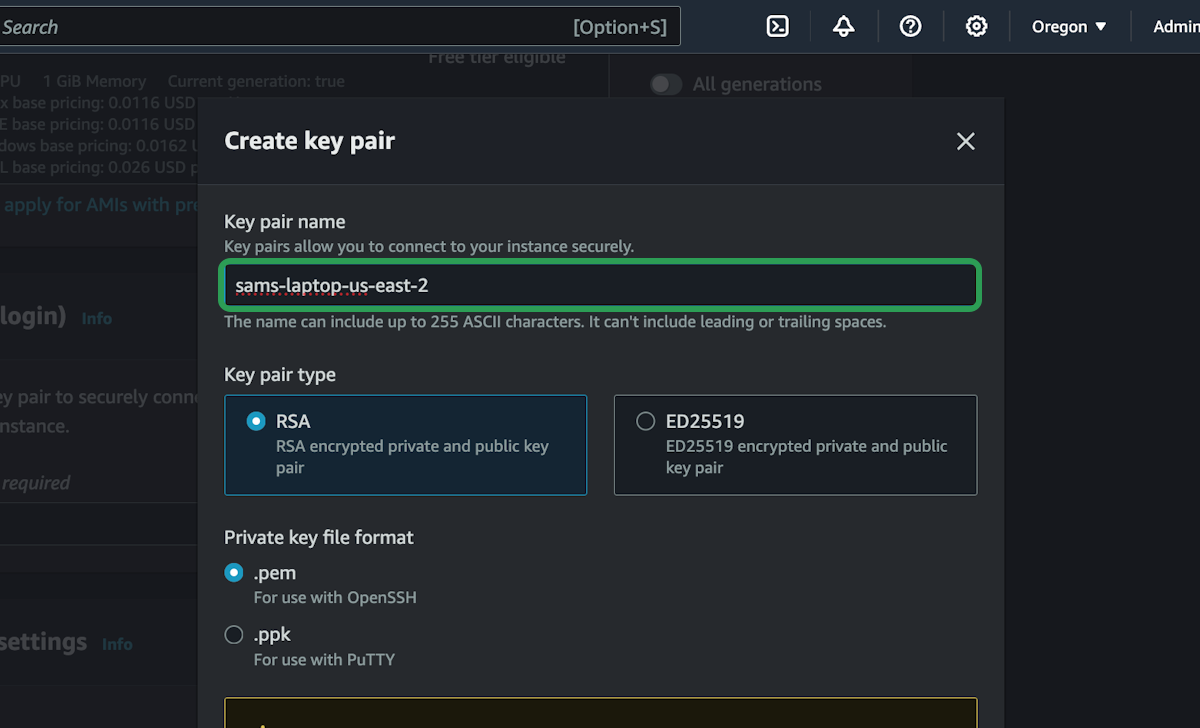
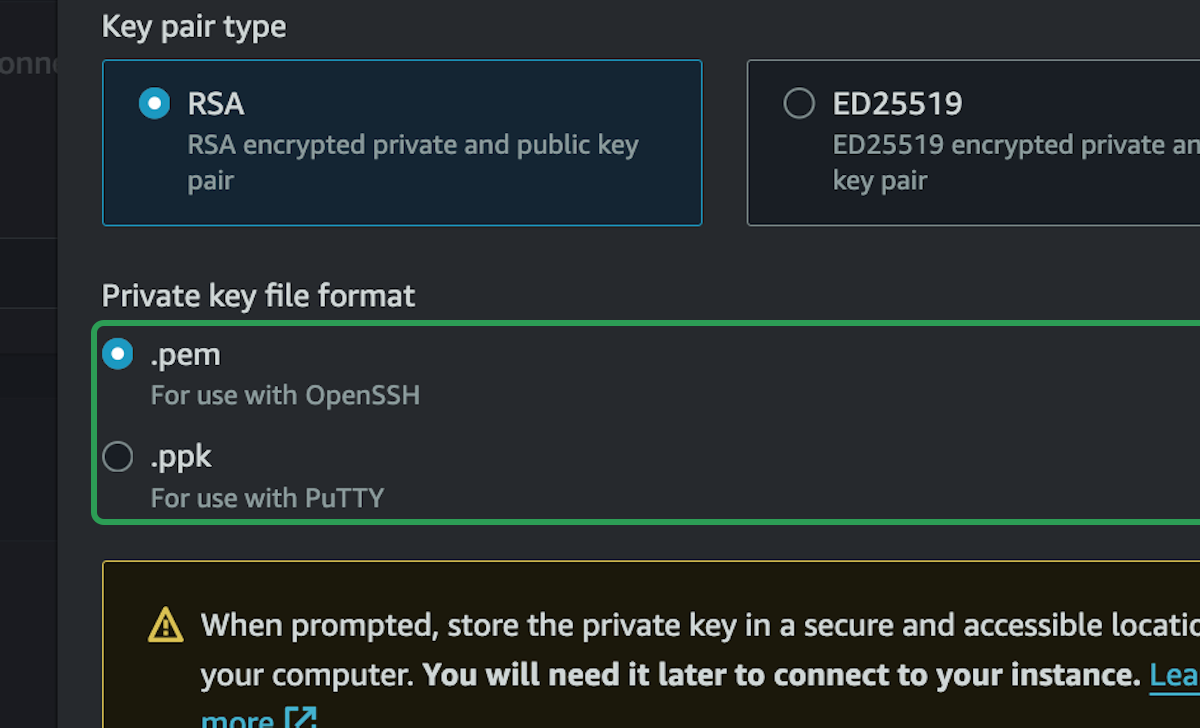
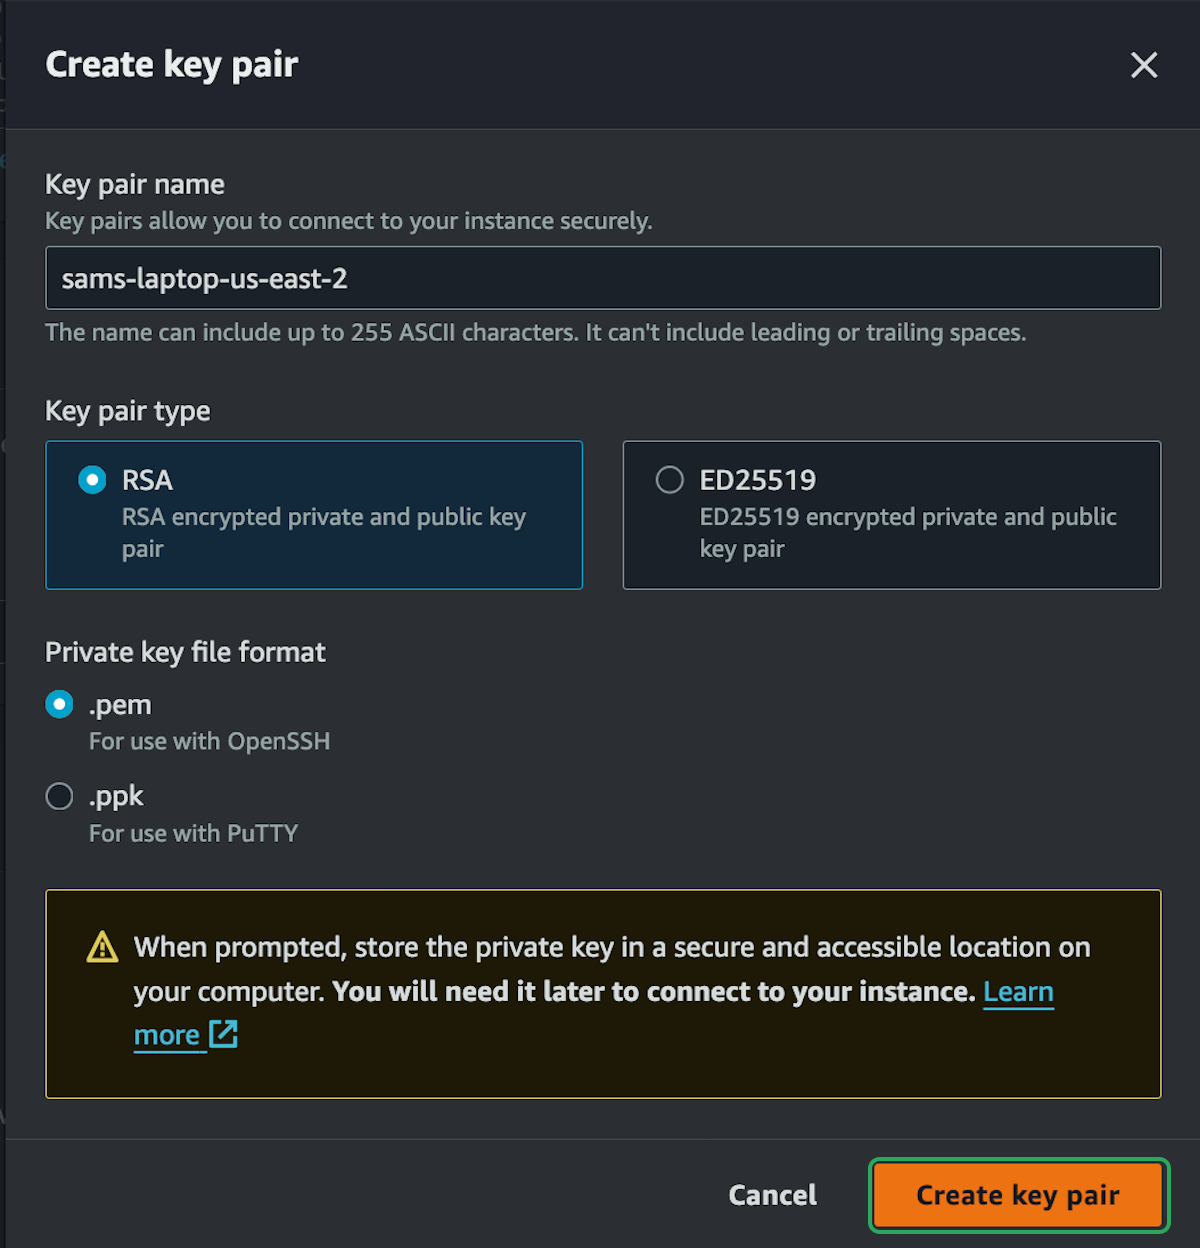
So I'm going to select Create a New Key Pair. We're going to leave all of
01:44
these as the default settings, and then I just need a name for this key.
01:47
This one is going to be specific to the region I'm in—Oregon or US West 2—and it's
01:52
going to be specific to this current machine I'm working on, because I'm not going to share keys across different machines.
01:58
So this is Sam's MacBook Pro.
02:02
You can name this whatever you want. I just find it handy to name it with the region and which machine I'm using.
02:06
This will create a brand new key pair in AWS and then download it onto my machine.
02:12
So I'm just going to save that into my Downloads folder for now. The next time I
02:15
set up an EC2 instance, I can just select that from the list of key pairs already in AWS.
02:20
Then for network settings, we can just leave this completely alone for now, because it's going to be on the default VPC.
02:26
We're not going to specify a subnet. It's going to enable a public IPv4 address by default so we can connect to it.
02:31
And then for the security group, we're going to log in with SSH, and currently the default selection is "Allow SSH traffic from anywhere."
02:37
If I keep that selected, it's going to allow SSH from anywhere. We could say "my IP address,"
02:42
but I think for now, let's just say "anywhere," just in case you set this up now and then try to log in from a coffee shop or work or something.
02:48
It's probably going to be easier while we're experimenting. Eight gigabytes of storage is
02:53
absolutely fine, and we don't need to modify any of the advanced details.
02:56
So just selecting a few options will set us up with a nice default Ubuntu instance.
03:01
We'll launch this instance—and again, this is on the free tier. So we'll terminate it
03:04
when we're done, but if we did leave this running, it would be free for the entire month.
03:08
That's fine. So now if I select this instance, just selecting the ID, I can see all the details about the instance.
03:14
If I select this checkbox here, this shows all the instance details.
03:18
So here's the public IPv4 address. This is how I can connect to it.
03:21
There's the instance ID, the public DNS name, and the private DNS name.
03:25
There should be a private IP address somewhere in here.
03:28
Yeah, it's at the top here—private IP address, public IP address.
03:31
These are all the details about the instance, but let's connect to it and actually do something.
03:35
If we go to the top here, there's a big Connect button. This will give you
03:38
a few different options on how to connect to your EC2 instance.
03:41
We are going to focus on using an SSH client to connect to the instance.
03:45
So in my case, I'm going to use Terminal from my Mac. Here is the command I need right at the bottom.
03:49
I can just copy and paste this into Terminal. So I'm going to paste this in here, and it's saying we're going to use SSH.
03:55
It's going to specify the key that I just downloaded into my Downloads directory
04:00
and then we're going to log in as ubuntu@, and then here is the hostname for my EC2
04:06
instance. But I could also use the IPv4 address if I wanted
04:09
to, which would just look like this.
04:13
So I can use the hostname, I can use the IPv4 address—it doesn't matter which one.
04:17
But we're going to log in using SSH, and currently this is in my Downloads directory, but
04:20
before we SSH, I'm actually going to move my SSH key because I don't like it being in my Downloads directory.
04:25
You can leave it there if you want, but I much prefer to put it in my .ssh directory.
04:30
That's where the key should go anyway. So what I'm going to do is move it from my Downloads directory.
04:35
What did I call it? US-west-2. Yep. I'm going to move the key from
04:38
my Downloads directory into my .ssh directory.
04:42
So now the key exists at /home/.ssh, which is the default location, at least on a Mac.
04:47
Then I'm going to close this window because right here we're going to connect using SSH, and now I can specify that path.
04:53
So home/.ssh/ and then my key right there.
04:57
This will try to use that key to connect to the Ubuntu instance, but I've skipped a step, so this won't necessarily work yet.
05:02
I'll say yes, I want to be able to connect to this IP address.
05:06
It says "unprotected private key file." So this isn't an issue on Windows machines, but it will
05:10
be on Linux and Mac because you have to chmod 400 the key first.
05:14
So I'm going to chmod 400 my
05:18
.ssh/us-west-2-sams-macbookpro-key.
05:23
Okay, so that's the key that I'm using for this. I only have to do this once, and now I can
05:28
set up any EC2 instance in this region using this key, and I won't have to do these steps again.
05:32
I can just run the SSH command to actually connect to it. So, SSH—there we go.
05:37
Yep, using that key to the Ubuntu instance, and this should—there we go—log me in.
05:42
So this terminal session right now is connected to an Ubuntu EC2 instance in Oregon.
05:47
Everything I do within this terminal now is running on that Linux machine.
05:52
The first thing I'd probably do if I set up a Linux machine is update everything, and once
05:56
that's done, I can start installing software or do whatever I need to on this Linux machine.
06:01
I'm going to keep this simple. I'm going to sudo apt install nginx so that we
06:07
can just set up a really basic HTTP server and see
06:10
how we can make an HTTP request to an Ubuntu instance in Oregon in this case.
06:13
Of course, it doesn't have to be NGINX. I could set up a Node.js or Ruby server or whatever I want, but we'll just stick with NGINX for now.
06:19
So now that that's installed, by default, NGINX should be allowing HTTP requests.
06:24
I'm just going to curl localhost on port 80, so just curling localhost.
06:28
And this is the default NGINX landing page. I can see that I can make a request to that from
06:33
within the instance, and I get back this HTTP response.
06:37
So now I should be able to go back into my instance.
06:41
I'm going to select my instance ID again, and using the public IPv4 address
06:45
or the public DNS, I should be able to make an HTTP request to that.
06:49
So I'm going to open this up in a new tab, and I'm going to hit enter—and nothing is going to happen because this site can't be reached.
06:56
It took too long to respond. So it's important to acknowledge what's going on here.
07:00
We're getting an error, but not an explicit one. We're not getting a 400 or a 500 HTTP response code here.
07:06
And if you look up here in the browser, you can see it's still loading—it just keeps spinning and showing the loading indicator.
07:11
These types of errors, I mean, you can see it here too—"it took too long to respond."
07:15
These types of timeout errors are usually a network issue, and a lot of the time with
07:19
an EC2 instance, it's going to be a firewall issue—a security group issue.
07:23
So anytime you run into these issues, where it's just
07:27
waiting—just timing out—you want to look at the network settings of your instance or whatever infrastructure you're using.
07:33
So in this case, we're going to go back to the EC2 instance, and that firewall is the security group.
07:38
So we're going to go over to the Security tab here, and check out the security group rule.
07:42
So I am allowing TCP connections on port 22—that's SSH,
07:46
but I'm trying to make a TCP connection right now over port 80, an HTTP connection.
07:50
So that is not allowed. The firewall is blocking it—I just can't get in. I don't have access to that.
07:54
So what we're going to do is select this security group by selecting the ID,
07:59
then we're going to edit the inbound rules, and here I can add a rule.
08:03
So I'm going to add HTTP, which will be port 80, and I'm going to allow this from anywhere IPv4.
08:10
I only have this set up for IPv4 anyway. If I had it set up as dual-stack IPv4 and IPv6, I
08:14
would have to make a rule for both IPv4 and IPv6, but this is fine for now.
08:19
So then I can save this rule, and this now updates the
08:22
firewall—the security group—to allow TCP connections on port 80.
08:26
So if I go back here using just the public IPv4 address, if I refresh this page, it should
08:32
immediately take effect and I should be able to connect to this.
08:35
But I should check—my browser by default will put an "s" at the front.
08:39
This is HTTPS, trying to connect over port 443.
08:42
So I need to delete that. I'm explicitly asking it to connect over HTTP—port 80.
08:46
Brave should complain because it doesn't like accessing unsecure sites, but that's fine.
08:50
I'm going to continue to this. This is my NGINX site. And there's the NGINX landing page.
08:54
So that works! We have deployed an Ubuntu EC2 instance, configured it—basically
09:01
just to work with NGINX—and now we're allowing HTTP connections.
09:05
I could modify this landing page to be a bit nicer.
09:08
I could go back into this Ubuntu instance and install any software I want.
09:13
I can install runtimes, I could set up a Postgres database with a Node.js
09:17
runtime, and an NGINX or Caddy reverse proxy at the front.
09:21
I can do all of that on this single EC2 instance, and we will do that in the next section.
09:24
We'll look at how to do that, and then see how to distribute it later since this is a full Linux virtual machine.
09:30
We can do pretty much anything we want on here. But this was just a basic example so we can get a sense of what's going on.
09:37
And then once I'm done with this instance—this part is very important—we're going to come back to the instance.
09:42
I'm currently in the Security Group, so I'm just going to head back to the EC2 dashboard—the easiest way to get in.
09:47
I'm going to go to Instances, and I can see that I have one instance running—this test instance.
09:51
When you are done with the instance, to make sure that you're not spending money on storage
09:55
or on compute, come up here to Instance State, and click Terminate/Delete instance.
10:00
And then definitely just terminate—make sure that it terminates. Once that's terminated, it
10:04
will get rid of the IPv4 address, get rid of the EC2 instance, and get rid of
10:08
the root EBS storage so you won't be paying for any of that.
10:12
So realistically, all I did there was pay for, like, five minutes of EC2.
10:16
It's all covered by the free tier anyway. But if you start spinning up a bunch of EC2 instances and forget to terminate them, you’re going to end up with a bill at some point.
10:23
So just make sure once you're done, just come in here and terminate the instance. You can always set up a new EC2 instance.
10:27
That's the point of cloud computing. You can always just tear stuff down and build it again, and it's good practice.
10:33
So get in the habit of terminating, and let's see now how we
10:36
can deploy different types of instances—like Windows and Mac instances.